

SilverCreek
-
Content Count
3,507 -
Joined
Posts posted by SilverCreek
-
-
11 minutes ago, TKenneth said:Poopdeck: Yeah, they're not necessarily more difficult, just trying to stick with flies that add on new technique into what I already know, to keep my skills gradually building. And thanks for the kind words.
Flyflinger: Agree on all your points, dubbing is still a pain for me and I'm always trying to get away with using less and less, but it seems like if I use any less that there will just be the bare thread. How many wraps do you think would be best for size 14 and 16 flies?
Flytire: Thanks for the history. Always interesting to see where things started.
I wrote a piece in Fly Tyer Magazine on how to dub. I wrote about it in the post below.
-
There are a subtle changes that you can make in how you tie a parachute pattern that determines how it rides on the surface film.
If you look a dry fly hackle carefully, you will notice that the barbs have a dull side and a shiny side. The barbs also have a natural curve so the shiny side has a convex shape and the dull side is concave.
So how you wind the hackle on the post and where you tie off the hackle will determine how the fly "sits" on the water surface.
Concave side down allows the tips of the hackle to project below the body of the fly and and support the fly higher on the meniscus. Theoretically, the hackle should act as springs because they are concave side down and gravity acts against the bend of the hackle. Concave side up and the hackle bends away from the water and the body of the fly has to depress the meniscal surface before the hackle even contacts the meniscus.
Tying the hackle down on the bottom of the post elevates the last wrap of hackle and the fly will ride lower than if you wrapped the hackle all the way down the post and tied off behind the hook eye.
So there are 4 possible combinations of how you wrap the hackle and where you tie the hackle off that determine how high the fly rides.
Finally, the length of the hackle tips also determine how high the fly will ride if you tie with the concave side down. The longer the hackle, the farther the tips will extend below the body.
How high you want the fly to ride, depends on whether you consider the parachute to be a dry fly or an emerger. So if you really think the parachute is a dry fly, I believe you should tie it concave side down with the hackle tied off on the hook.
I tie off on the post with the concave side up, not because it is the easiest way to wind and tie off the hackle. I do it because I agree with Gary Borger that the parachute more of an emerger pattern than a true dry fly. Gary believes the trout see the post of the parachute as the body of an emerging dun and not the wings of an adult dun. Gary discusses the parachute fly in his book, Designing Trout Flies.
Go to this link where Gary discusses the parachute as a Stage 3 emerger.
https://www.garyborger.com/2016/09/09/parachute-flies-stage-3-emerger/
I believe that parachutes work better than standard dries for the same reason that sparkle duns work so well. They ride low in the film. I tie some parachutes with zelon tails to mimic the end of the developing shuck just the same as a sparkle dun.
If you look at the Klinkhammer pattern, it is essentially a parachute tied on a bent hook so that the body of the fly projects into and below the meniscus. Ever wonder why a parachute that has taken a fish becomes more effective? It looks even more like an emerger or a cripple and less like a dry, especially if the back half of the fly begins to sink.
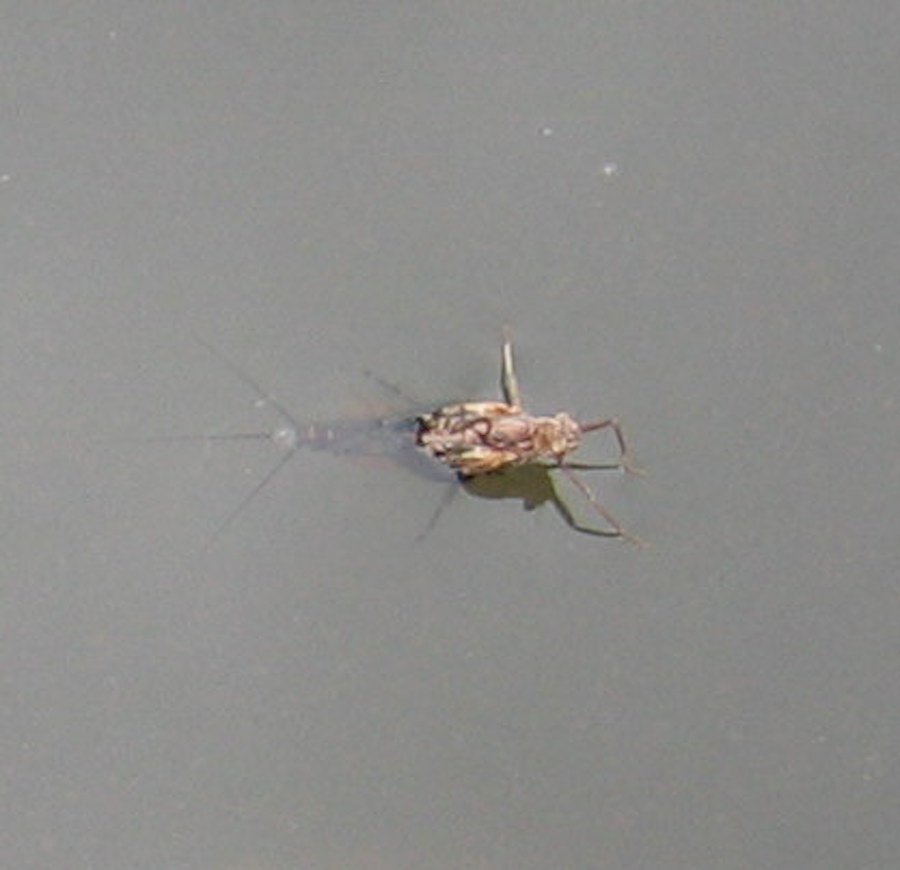
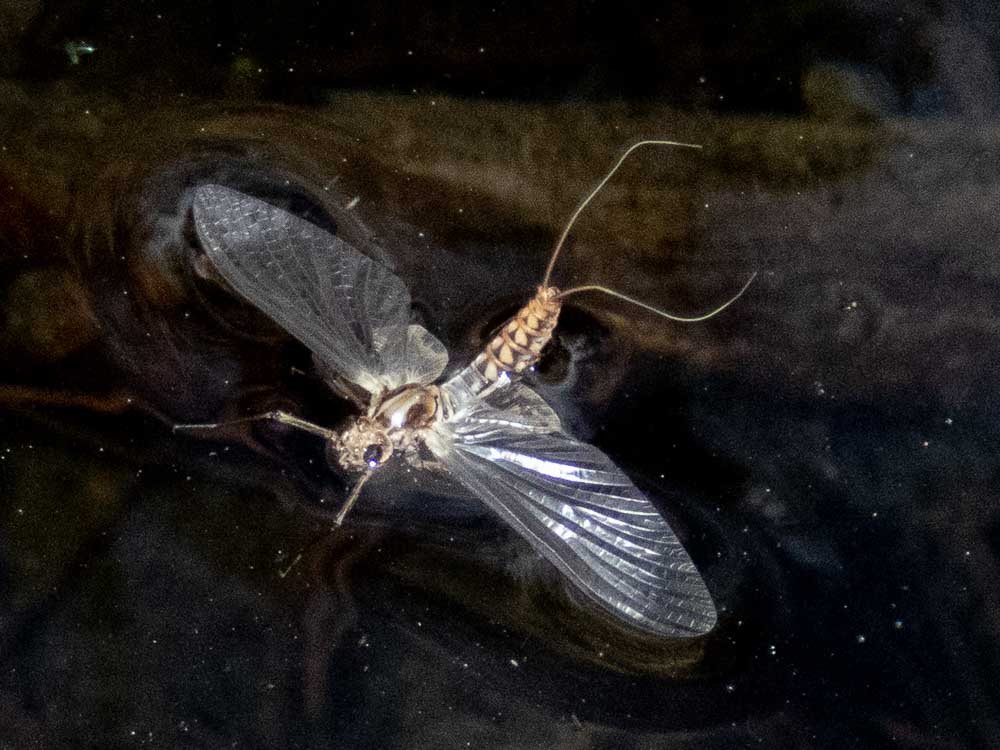
This what Stage 3 of mayfly emergence looks like.

Gary describes stage 3 below:
"Stage three of emergence of the three groups that hatch at the film—mayflies, caddis, and midges—occurs as the adult pulls itself free from the nymphal or pupal skin. The wings have started out (Stage 2) and now comes the head, and legs. The body of the insect is sticking straight up, or nearly so, the wings are pulled down along its back, the legs are out and on the water. It looks for all the world like a Parachute Adams or Klinkhammer. The parachute “dry” flies are actual emergers. The body is below the hackle and so it snuggles into the film or actually rides below the film—just like the nymphal or pupal body of the emerger.
The Parachute Adams is a great representation of stage three. Tie the Adams Family; in addition to the gray body of the original, tie them with a black body, a pale yellow body, a tan body, and a pale olive body in sizes 12 to 20 and you can match nearly all the mayflies, caddis, and midges that are emerging. A great fly."
http://www.garyborger.com/2016/09/09/parachute-flies-stage-3-emerger/#jp-carousel-6393[/img]
-
Thanks flytire
-
You are getting MUCH better.
I am getting picky here since I think you did a good job.
When I click on the photo, I notice that the fly body has guard hairs sticking out of the dubbing. The original adams was tied with muskrat underfur fur that was untanned and therefore still has the natural oil on the underfur to make it waterproof and help the fly float.
Grab the fur between the thumb and forefinger of left hand and cut the fur off at the skin. Now grab the bottom the cut fur with the thumb and forefinger of your right hand. Now grab the guard hairs, which are the long hairs that stick out and pull them out. That will leave just the soft underfur. Now when you dub the body, there will be no long hairs sticking out. The fly body will be smooth. You can trim the guard hairs off if this fly for a smoother body,
The back of dubbed fly body goes Slightly too far back just slightly past where the hook starts to bend. It makes the fly body just slightly too long. I mention this just so you will notice it.
These are very MINOR faults and really make no difference on how the fly will fish. So for the next Adams, pick out the guard hairs out of the fubbing, use the proper tail hackle, and dub a slightly thinner body.
You have done very well in a short time!
-
Palmered hackle length on a dry fly should be about 1.5 times the hook gap.
Proportions are key. Fly proportions are judged relative to the length of the fly body. The hook length determines body length so measure the length of the material whether it be hackle, wings, or tailing material against the hook to determine where the tie in point is on the material to get the right length on the fly.
For example, I tie the hackle on a dry fly about the length of the fly body so to find hackle of the correct length, I measure it against the length of the hook shank.
Here is some suggested reading to get you on the right track.
http://www.sexyloops.com/flytying/proportion.shtml
https://www.flyfisherman.com/editorial/tying-flies-beautiful-flies/151957
https://www.flyfisherman.com/editorial/tying-flies-beautiful-flies/151957

-
Epistemology is the theory of knowledge. It is the study of how we justify what we believe to be true.
Even if we did not know that trout see the same colors that we do, the simple fact is that we can only imitate what WE SEE.
Suppose that trout could see into the ultraviolet or infrared spectrum. How can we imitate that color if we cannot see that the natural insect reflects colors in that spectrum. The obvious answer is that we cannot. We cannot know what we do not know!
-
Trout essentially see the same colors that we do but they see very poor detail since the trout retina does not have a macula.
Read Gordon Byrnes article on trout vision:
-
Thanks for the vote of confidence.
Here's a post about my resin from a member of The Fly Tying Forum.
-
I hope it helps.
-
John,
I wrote some instructions on how to dub fly bodies on the link below with following comment by noted fly tyer Al Beaty.
-
If your ultimate goal is to tie a fly that the most selective of fish will take as a natural, then you need to do two things very well.
The first is to pick out the most realistic pattern and this requires some understanding of what trout look for and what makes for a realistic pattern,
The second is the ability to tie the pattern well and that not only includes the ability to tie well BUT also the requirement to have the proper tools, materials, and tying ability.
If your goal is also catching that fish, then requires stalking, casting, mending, and strike detection skills as well
-
To add to what Chugnug posted, the Hockley method of split tails is from my post back in 2017.
Bud Hockley of Baltimore Maryland also devised a method of tying spit or fan tails which is both elegant and simple . This method was described in the 1985 September issue (vol 16, issue 6) of Fly Fisherman Magazine, pg 36 by none other than John Betts, the originator of microfibbets.
1. Tie an even number of Betts microfibbets or stiff hackle fibers in the usual manner and overwrap them with thread back to just before the start of the bend of the hook. Give yourself the room for two more wraps of thread before the bend starts.
2. Take a smooth dubbing needle and place it across the hook between the tails and the hook. Slide the needle toward the eye of the hook so that it lifts the tails off the hook. Now wrap two turns of thread around the dubbing needle and the hook as if you were going to tie the needle to the hook. This will slide the two turns of thread under the tail fibers. Gently pull the needle out as you tighten the thread, and guide the thread so that they lie around the hook, but under the tail fibers, and just in back of the thread wraps which tie the tail down.
3. Now take the dubbing needle and place it along side of the hook closest to you with the tip of the needle toward the eye of the hook. There should be a little space between the hook and needle to maneuver the needle. Now take the thread around the needle, and between the hook and the tails, as if you were going to tie the needle to the back of the hook. As you tighten the thread, gently remove the needle and guide the thread so that it comes to lie on top of the two wraps you place in step two. This wrap will further splay the tails from the back of the hook
4. Keep repeating step three to place multiple wraps of thread just at the base of the tails, between the tails and the hook, until the tails begin to fan and split. When you have built up the thread ball, use your fingers to even up and split the tails and elevate them if you want.
5. Now take the thread and take a couple of cross wraps around the tail to hold them in the final position.
There you have it. The Hockley method of split or fan tailing a fly without using a dubbing ball. BTW, Hockley uses it for stonefly nymphs as well as dry flies.
-
John,
My premed major at Stanford University was chemistry and I make and sell my own brand of UV resin. I also sell UV lights.
I will PM you if you need information on how to purchase
Here are some threads from this BB about my products:
http://www.flytyingforum.com/index.php?/topic/78997-silver-creeks-uv-coating/
http://www.flytyingforum.com/index.php?/topic/80683-uv-resins/
https://www.theflyfishingforum.com/forums/index.php?threads/uv-resins.767872/
http://www.flytyingforum.com/index.php?/topic/78049-silver-creek-resin-great-stuff/
http://www.flytyingforum.com/index.php?/topic/78123-a-few-with-silver-creeks-uv/
-
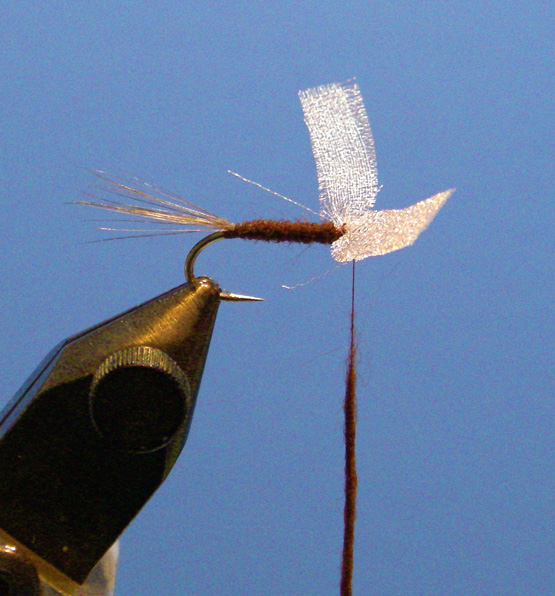
I like it but I have 2 suggestions.
If you are going to use parachute post material for the wings, less is more. Use less material but spread it out and spread the fibers out and fix them in place with UV glue.
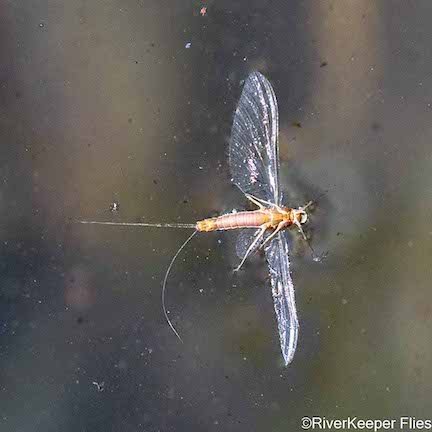
Note how a real mayfly spinner looks on the water.
Suggestion 1 - If you are going to use parachute post material for the wings, less is more. Use less material but spread it out and spread the fibers out and fix them in place with UV glue.
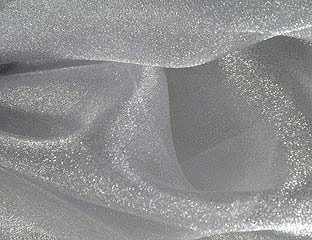
Suggestion 2 - However, the best and cheapest material I have found for spinners is white twinkle organza fabric. You can buy a yard of it for several dollars. It works because it sparkles simulating the sparkle of spinner wings.
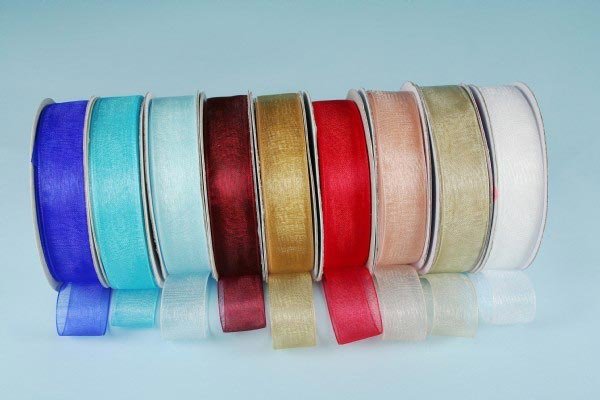
Rather than organza fabric, you can also buy white organza ribbon.
Do NOT take the fibers apart. Tie it in as a strip of fabric and then remove the cross threads after the wing is tied it. Leave some cross thread at the base of the wing and this helps maintain spread of the fibers.
See the way Gary Borger ties it in this chocolate spinner pattern.
Full tying directions here:
Gary Borger Twinkle Wing Spinner
Pasted Graphic.tiff Pasted Graphic.tiff
-
I'm surprised that they would include that as a pattern for you to tie.
As I said, the most common rust colored fly pattern is the rusty spinner and so I am surprised they did have you tie that one with the rust colored dubbing. It's a pattern that you will use much more often than a rusty parachute.
I am going to ask other fly tyers who are are reading this. Any of you have rusty parachutes in your fly boxes?
-
Who makes that fly tying kit?
-
1 hour ago, Trouttramp said:Some of those bills are almost undecipherable.
I had a hospital stay of 7 days, three heart procedures, blood and urine tests plus doctor visits every day. A return visit for a stroke for two days with an MRI and CAT scan.
That’s with three visits to the ER and one ambulance ride.
The final hospital bill was in excess of 90k, over two dozen pages of line item charges, some I can’t even pronounce or understand.
No one short of a medical accountant can understand those bills.
When my wife and I turned 65, we bought the best supplemental coverage we could get. The bill to me was 258$Most expensive bill we have is medications, even with the best scrip plan out there, we still pay 8-10k a year combined for meds, and we have shopped around for the best prices. Some meds do not get discounted no mater where you buy them.
There MUST be a better way.
TTHave you looked into getting drugs from overseas?
Drugs from companies in Canada are cheaper.
https://www.singlecare.com/blog/ordering-medications-from-canada/#:
-
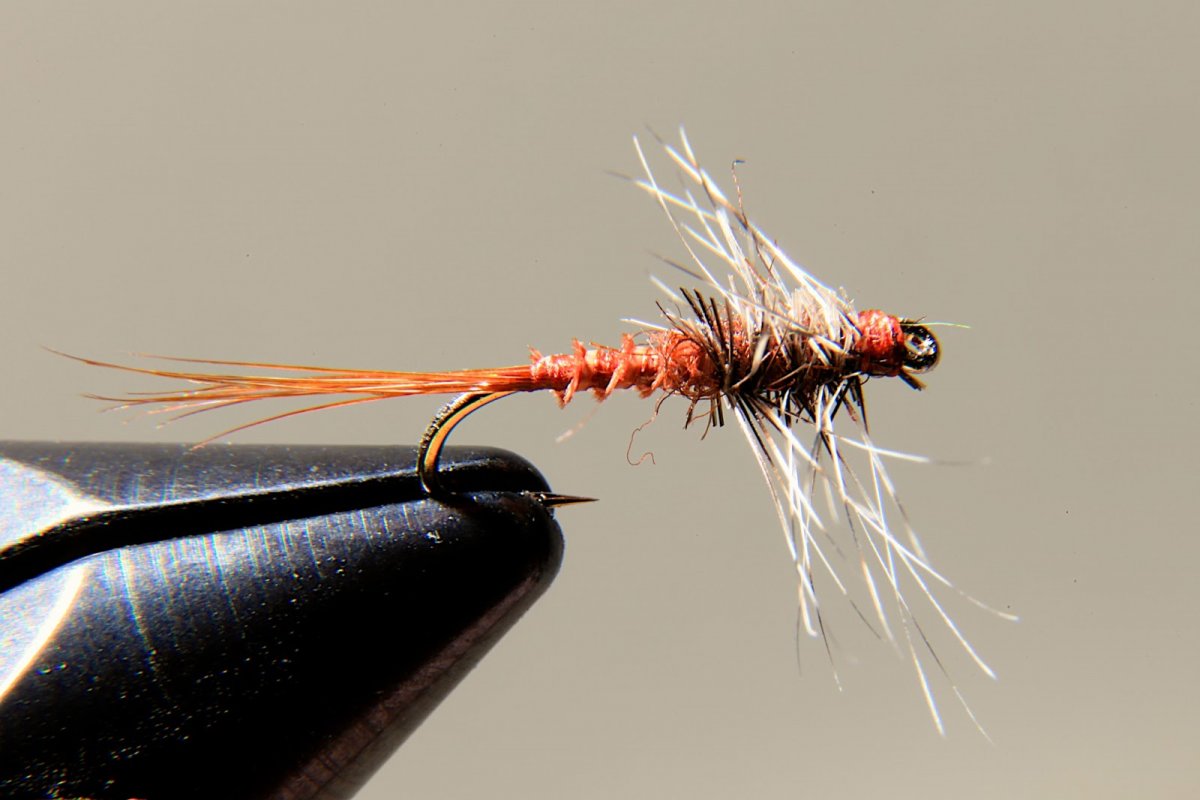
When you google "rusty mayfly patterns" you will find that they are rusty spinner (mayfly imago stage) patterns.
Spinners have thin bodies so I would use less dubbing.
Trout will take a parachute as a spinner but if they do not clip the front and rear hackle so they form "cross" shape of an imago stage "spent" spinner on the water surface.
An even easier spinner pattern is to tie a Catskill variant dry fly and trim off the top and bottom and the fly will be a spinner pattern.
There are no "rusty" brown subimago stage mayflies that I know of.
-
OK, I have reposted what I was going to suggest.
Note the narrow "waist" in your fly at the arrow.
To prevent that "narrow waist," after tieing in the tail of the fly; bring the thread to the area of the post position and tie in the post first on the hook.
Then tie the hackle in and wind it up the post. Make sure the concave side of the hackle is facing the post so that when you wind the hackle down the post later, the convex side of the hacke will face up. This will make the hackle tips face up away from the water and the the fly to lie deeper in the film. A parachute fly is NOT an imitation of the subimago stage of a mayfly. It actually a late stage emerger imitation!
With the post and hackle tied in, it will out of the way and you can then dub the body in a continuous smooth contour around the bottom of the post all the way to the hook eye.
When dubbing from the post to the hook eye dub sparsely so then you can dub sparsely BACK to the bottom of the post. Now you will have a seamlessly dubbed body from the tail of the fly. Then do the following:
Directions for whip finishing on the post.
Finish the dubbing so the thread is hanging off the back side of the hook just BEHIND of the post. Then take the thread, and instead of taking it around the hook again, bring it around the post so it is hanging ahead of and on your side (front) of the hook.
Now wind the hackle down the post clockwise as seen from the top of the post. When it gets down to the bottom, take the thread around the hackle and post in a clockwise fashion and whip finish on the post.
Here’s a video on whip finishing the hackle on the post
-
Deleted post
-
1 hour ago, flytire said:thank john betts who found them in the 1980's
He passed in 2018. Here is a link:
http://classicflyrodforum.com/forum/viewtopic.php?t=115453
https://www.legacy.com/us/obituaries/pressdemocrat/name/john-betts-obituary?id=1641012
-
Microfibbets are the fibers from artist's paint brushes. I wait until there is a coupon for JoAnns, Michaels, or Hobby Lobby, then buy a wide flat brush.
You can color them with a permanent marker if you buy the white brushes. I buy the one below and cut off the handle.
Note the tiny parachute fly below with the fan tail of paint brush fibers. Also note that I have cut fibers off the left side of the paint brush. Since the fibers are lined up on the brush, there is no need to "stack" the fibers before tying them in.
-
My brother-in-law, John is a retired professional baker and he ran the largest commercial bakery on the East Coast which baked all the Langendorf and Entenmann's baked goods for New York City.
I gave him a copy of the original No-Knead-Bread recipe developed by Jim Lahey of the Sullivan Street Bakery in NYC which was first appeared in the New York Times. He called it the best home-made bread recipe he had ever tried.
Original No-Knead Bread recipe.
https://bittmanproject.com/recipe/no-knead-bread/
There are now many versions of it including faster wait times but the original is the one we still use.
Here are the 3 versions all published by the NYT over the years
Recipe: Original No-Knead Bread
Adapted from Jim Lahey, Sullivan Street Bakery
Time: About 1 1/2 hours plus 14 to 20 hours’ rising
3 cups all-purpose or bread flour, more for dusting
1/4 teaspoon instant yeast
1 1/4 teaspoons salt
Cornmeal or wheat bran as needed.
1. In a large bowl combine flour, yeast and salt. Add 1 5/8 cups water, and stir until blended; dough will be shaggy and sticky. Cover bowl with plastic wrap. Let dough rest at least 12 hours, preferably about 18, at warm room temperature, about 70 degrees.
2. Dough is ready when its surface is dotted with bubbles. Lightly flour a work surface and place dough on it; sprinkle it with a little more flour and fold it over on itself once or twice. Cover loosely with plastic wrap and let rest about 15 minutes.
3. Using just enough flour to keep dough from sticking to work surface or to your fingers, gently and quickly shape dough into a ball. Generously coat a cotton towel (not terry cloth) with flour, wheat bran or cornmeal; put dough seam side down on towel and dust with more flour, bran or cornmeal. Cover with another cotton towel and let rise for about 2 hours. When it is ready, dough will be more than double in size and will not readily spring back when poked with a finger.
4. At least a half-hour before dough is ready, heat oven to 450 degrees. Put a 6- to 8-quart heavy covered pot (cast iron, enamel, Pyrex or ceramic) in oven as it heats. When dough is ready, carefully remove pot from oven. Slide your hand under towel and turn dough over into pot, seam side up; it may look like a mess, but that is O.K. Shake pan once or twice if dough is unevenly distributed; it will straighten out as it bakes. Cover with lid and bake 30 minutes, then remove lid and bake another 15 to 30 minutes, until loaf is beautifully browned. Cool on a rack.
Yield: One 1 1/2 pound loaf.
Speedy No-Knead Bread
Time: About 1 hour, plus 4 1/2 hours’ resting
3 cups bread flour
1 packet ( 1/4 ounce) instant yeast 1 1/2 teaspoons salt
Oil as needed.1. Combine flour, yeast and salt in a
large bowl. Add 1 1/2 cups water and
stir until blended; dough will be shaggy. Cover bowl with plastic wrap. Let dough rest about 4 hours at warm room temperature, about 70 degrees.2. Lightly oil a work surface and place dough on it; fold it over on itself once or twice. Cover loosely with plastic wrap and let rest 30 minutes more.
3. At least a half-hour before dough is ready, heat oven to 450 degrees. Put a 6- to 8- quart heavy covered pot (cast iron, enamel, Pyrex or ceramic) in oven as it heats. When dough is ready, carefully remove pot from oven. Slide your hand under dough and put it into pot, seam side up. Shake pan once or twice if dough is unevenly distributed; it will straighten out as it bakes.
4. Cover with lid and bake 30 minutes, then remove lid and bake another 15 to 30 minutes, until loaf is beautifully browned. Cool on a rack.
Yield: 1 big loaf.
Fast No-Knead Whole Wheat Bread
Time: About 1 hour, plus 5 hours’ resting (October 8, 2008)
2 cups whole wheat flour
1/2 cup whole rye flour
1/2 cup coarse cornmeal
1 teaspoon instant yeast
1 1/2 teaspoons salt
Oil as needed.
1. Combine flours, cornmeal, yeast and salt in a large bowl. Add 1 1/2 cups water and stir until blended; dough will be shaggy. Cover bowl with plastic wrap. Let dough rest about 4 hours at warm room temperature, about 70 degrees.
2. Oil a standard loaf pan (8 or 9 inches by 4 inches; nonstick works well). Lightly oil your hands and shape dough into a rough rectangle. Put it in pan, pressing it out to the edges. Brush top with a little more oil. Cover with plastic wrap and let rest 1 hour more.
3. Preheat oven to 350 degrees. Bake bread about 45 minutes, or until loaf reaches an internal temperature of 210 degrees. Remove bread from pan and cool on a rack.
Yield: 1 loaf.
-
26 minutes ago, CDewberry said:now, why did you do that? one of us other newbs good have benefited from that knowledge. thin skinned or otherwise...
You can go to my post on this link:


Question came up over the weekend
in The Lodge
Posted · Report reply
I was at Stanford during the Vietnam war and one of my friends and classmate was in my freshman dorm. He was in the Navy ROTC and the Stanford ROTC was firebombed and burned down.
So he had to wear his Navy uniform and travel to the Cal Berkeley Campus, which was a hotbed of Vietnam protests to do his weekly ROTC drills. He got a lot of abuse every week.
His major was engineering and after graduation, he entered the US Navy submarine service. He eventually became Captain of the Ohio, the first Ohio class ballistic missle submarine and the largest ballistic missile submarine the US Navy has ever built.
We exchange Christmas letters and I once asked him what he worried most about as the Captain of the Ohio. He said it was the security of the ballistic missiles on board.
After he "retired" from tours on the Ohio, he taught at the US Naval War College. He taught courses for the captains of attack submarines on how to hunt down enemy missile submarines.