INS 0 Report post Posted April 17, 2009 Soft Tex works great. :bugeyes: Quote Share this post Link to post Share on other sites
Guest Report post Posted April 17, 2009 Testors from Wallyworld and some glitter fingernail pollish...Used epoxy for longevity on balsa crankbaits but it would yellow in time... Quote Share this post Link to post Share on other sites
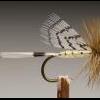
Flyfisher13 0 Report post Posted April 21, 2009 I use. 3 hours Zpoxy coat. On my poppers. Very nice popper! Is that body made of basa??? Quote Share this post Link to post Share on other sites
Fred H. 0 Report post Posted April 21, 2009 I just wanted to say I am still amazed at the talent we have on this forum in all aspects of tying. You guys make some magnificant poppers . I also wanted to add that I have had good sucess with adding acylic paint to epoxy . It's nice when you want to add some colored bumps to your popper to give it some texture. Fred Quote Share this post Link to post Share on other sites
BassBugn 0 Report post Posted April 21, 2009 Great video, Curtis Fry. Great looking poppers Stippled & Japasam. If I may ask Stippled, what paint are you using? I've experimented with Folkart acrylic paint on foam, only because my wife uses it to paint murals on walls, so I thought I would give it a try. I've also tried Testor's model acrylic paint. I have not gone really far. This was something I was fooling around with a month ago and then we moved. So I want to continue with it a little more. This post on poppers has been very informative. Steve Quote Share this post Link to post Share on other sites
Stippled Popper 0 Report post Posted April 22, 2009 Steve Thanks for the interest. I favor Delta Ceramcoat. But also use Anita's All Purpose Acrylic if I can't find a color in Delta locally or they just don't make it. I add a little distilled water to them as they thicken in the bottle to be able to use them longer. Anita's tends to be much thicker to begin with. Sometimes I have to mix my own colors but do it starting with colors from the same source. Mixing Anita's and Delta didn't work so well for me. Quote Share this post Link to post Share on other sites
BassBugn 0 Report post Posted April 22, 2009 Steve Thanks for the interest. I favor Delta Ceramcoat. But also use Anita's All Purpose Acrylic if I can't find a color in Delta locally or they just don't make it. I add a little distilled water to them as they thicken in the bottle to be able to use them longer. Anita's tends to be much thicker to begin with. Sometimes I have to mix my own colors but do it starting with colors from the same source. Mixing Anita's and Delta didn't work so well for me. Thanks Stippled I will be stopping in at Michael's or A.C. Moore soon for supplies. Quote Share this post Link to post Share on other sites
Flyfish Dog 0 Report post Posted May 2, 2009 I use 20 min Flexi Cote for all my poppers. Using a slow turning dryer is a must to make your life and work easier. Letting all the paint dry for a couple days will give you better results no matter what you do. I then give it a high gloss coat of Sally Hard as Nail after the epoxy has dried for a week. Doing all the right things in each step which takes a lot of time but the finished results are so much nicer. Quote Share this post Link to post Share on other sites
NEKvt 0 Report post Posted May 9, 2009 I use d2t to coat my poppers, foam and balsa. A couple of tips that I didn't see in previous posts that might help. 1. For a cheap turner epoxy a drill bit into a round piece of wood, place in drill, tape drill on low speed. Only cheap for those of you that already have a drill. 2. The bottoms of aluminum cans work great for mixing epoxy in. Cut the can in half, hammer the sharp edge to roll it over for safety. You can mix a batch, clean it out with ethyl alcohol and reuse it for your next batch. Great ties and tips in this thread guys. Quote Share this post Link to post Share on other sites
perchjerker 0 Report post Posted May 9, 2009 For the past ten years I have used Difco 2-Ton Epoxy, diluted 1:1 with 70% isopropyl alcohol (=rubbing alcohol) to put a final coat on my balsa bodied bass and brim bugs. In spite of what many think, or believe, it DOES NOT turn milky, or at least it doesn't for me. (May be the climate here in Houston.) I do not use the colored or scented. Just the "raw" stuff. I use the 2-Ton epoxy as it has a 30 minute pot time, whereas others readily available locally have much shorter pot times. I put the coated bugs on my turner until the epoxy is completely cured. One can readily determine when it is completely dry by saving the leftover mix and touching it after a couple of hours. This way, your fingerprints are on what is to be ultimately discarded; NOT on your bugs. Although, your fingerprints on your bugs might be helpful in recovering any bugs your fishing buddy may have pilfered from your boxes. I have played around with coloring the epoxy and find it can be done using the Testors paints; but have not tried other types. So far, it takes too much time to get a uniform distribution of the paint in the epoxy, which uses up valuable pot time. Consequently, I typically brush paint. However, for some particular effects, I do spray paint; especially for scale patterns. I also add glitter to the diluted epoxy before coating some of my bugs. I put the glitter only on the bottoms and lower sides, as this is the area of the bug typically seen by the fish. It is worth a trip to friendly neighborhood hobby/craft store to check out the various colors, and sizes, of glitter that is available. I use the fine. Quote Share this post Link to post Share on other sites
Dart 0 Report post Posted May 24, 2009 This has been an extremely helpful topic. There are some great looking poppers here, for sure! I've been using Testor's enamel, but I'll try out the Delta Ceramcoat as soon as I can find some. What kind of popper bodies (and corresponding hooks) do you guys use? I've been using Perfect Popper Bodies by Wapsi with Mustad 33903 Kink Shanked hooks in the corresponding size. I have noticed the hook gape seems smaller than some of the Perfect Popper "sets" that are sold by places like Bass Pro Shops. How do you secure the hook? Do you fill the slot on the bottom of the body? If so, what's your method? I use 5 Minute Z-Poxy to fill the hook slot. I add a little more than is necessary to fill the hole. After the expoxy dries (I give it a day to fully cure), I sand the excess and smooth out the rest of the popper where ridges formed from the molding of the body. I've tried using a dremel to sand the body, but it's a bigger pain to do that rather than using an emory board. Quote Share this post Link to post Share on other sites
Rob Knisely 0 Report post Posted May 25, 2009 Holy Smokes! What a lot of info! It's amazing just several years ago this was such an obscure topic. Good to see everyone experimenting and figuring out some great stuff! My .02 worth: -Some nail polish clear coats are made from different bases, and may thin certain paints like lacquer or oil-based and make your cool designs run as you apply it, so test those first. -Acrylics are set for life after they dry (unless a very potent solvent is applied to it) and flexible. These are good for soft-foam bodies and resist chips and flaking off better than paints like enamel or lacquer. -If painting with lacquer paints, do NOT use a lacquer clear coat unless your body is solid... it will thin your design and it will run all together. -Never use 5 or 15 min epoxy (check the set time on the package)... these will yellow on the first day of fishing and become brittle in the sun. -Two-ton epoxy is great (usually sets-up in 30-45 mins). That's enough time for any bubbles to surface and break before it sets, doesn't yellow, and you can get at least half a dozen bodies coated before it starts setting up. -Epoxy coated poppers WILL crack and the coating will break off in small pieces if you bang a lot of rocks... so either watch your casts, or use clear acrylic, which is more flexible. -Acrylics, while more flexible, are less durable, so will succumb to rough bass teeth quicker than epoxy or nail polishes. -If you use nail polish, at least make your overcoat clear Sally Hansens... this is infused with fiberglass particles (guess the ladies don't dig chipped fingernail polish ). -Spray enamel, spray acrylic, brush-on acrylic (doesn't matter the brand- pretty much all the same aside from color tone and consistency unless you find a basement knock-off/rip-off brand) * (oh, and any acrylic can be thinned with water for dynamic affects if you're the artist type), permanent marker, colored pencil, crayons, ink pens, and more... all remain stable under a coat of 2-ton epoxy (your pattern doesn't smear). -Add a small amount of fine glitter to 2-ton epoxy for cool effects. As said, a small drop of enamel or acrylic model paint will tint the epoxy, but don't use too much or it will affect the integrity... it won't set up and remain tacky. -Always use a turner so your finish can smooth itself out, and use thin coats- if you want a thick coat of epoxy, do it twice or 3 times. Bottom line... get creative and use whatever means necessary to get the design you want on your foam body, then coat with 2-ton epoxy and put on a rotary drier. The only downside: it will crack if you double-haul it hard against a cliff face from 40 feet away. Good posts everyone! :headbang: -Rob Quote Share this post Link to post Share on other sites
tidewaterfly 0 Report post Posted May 25, 2009 Great info! Dart, I also use the Wapsi heads, but use other hooks. I used that Mustad 33903 hook for many years, it's still a good & reasonably inexpensive hook, but the Mustad Signature Series popper hook is much better IMO. I also use some Gamakatsu & Owner straight shank worm hooks with the bigger size heads. They have barbs on the shank, and when epoxied in place, they hold real well without twisting. I don't use the size hooks that they indicate on the package either, they just don't fit right or look right to me, so I end up using bigger size hooks. To fit the hooks in the heads, I open up the slot with either a hack saw blade or a Dremel tool, then I use tying thread to get a tight fit if needed. I fill the slot with epoxy, insert the hook, then fill the slot again with epoxy. I also add a little more & sand off the extra with an emory board. Quote Share this post Link to post Share on other sites
BigDaddyHub 0 Report post Posted May 25, 2009 Just adding my opinion on the drying of 2-ton....have only had a problem with running and dripping the first few times I used it....I have found that if the epoxy is applied thinly, it dries perfectly, with no drips, and no need for a dryer...I use the foam trays meat is packaged in....the trick is to apply the epoxy with a quality hair brush....nylon bristle brushes with sometimes leave "brush strokes" and inferior (kids crafts type brushes) brushes leave behind traces of hair in your finish...I use cheap, but good, hair bristle brushes by Delta Ceramics....not the cheapest brushes for disposable style work, but certainly not that big of a deal.....10 brushes for $4.00..But I have to concur with Rob....great info in this thread...as is the norm for this Forum! Quote Share this post Link to post Share on other sites
Dart 0 Report post Posted May 25, 2009 Stippled Popper's technique is great and I'm working on learning it for the body. First I'm using it to create eyes. I didn't have a set of tools to use, but my brother, Nealbo, suggested I use the butt end of a drill bit. If you have a drill index, you've already got all of the tools you need. To get the concentric circles for the eyes, I've found it helps: 1) Shake the heck out of the bottle of paint. Not only does it mix the paint, but it ensures there is a nice, mixed coat on the inside of the cap. 2) Get a thin layer of paint on the end of the tool (or drill bit). The paint should just cover the end, and should not be a drop. 3) Use the tool as a "stamp." You shouldn't be dropping the paint on, but instead lightly touching it to the surface of the popper. If you stamp too hard, the dot will not be filled in properly... touch it LIGHTLY. Wait for the paint to dry, go down a size, change colors, repeat. For the pupil, I've found it helps to go down a couple of sizes... the poppers I tied today look like they're strung out on caffeine! :bugeyes: Quote Share this post Link to post Share on other sites