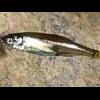
Firetiger 0 Report post Posted July 17, 2010 Step 1: The Hook I am using Skalka Pupa hook in #12, but any pupa (lighty curved) hook will do. Size 12 seems to fit most closely the Caddises in my neigbourhood, but as there are myriads Caddis species around it may be necessary to adjust by moving up or down in size. Step 2: Thread & Weight Using weight on your pupa flies is controversial topic, with some tiers strongly against. I go the middle ground, with just about two turns of flat lead by the hook bend. The little weight will help the fly to break through the surface film and attain the proper "rising" position heads up, bottom down. For thread I am using 8/0 UNI in color Tan. Step 3: Abdomen Cover & Ribbing Caddis pupae have distinct dark stripe on top of their abdomen. I consider it to be an important feature of the natural and imitate it with a slip of motley Turkey feather ribbed with yellowish thread. I believe it to be more pleasing to the eye of tyer to attach the ribbing to bottom of the fly, so the ribbing starts from bottom. The fish don't seem to care. Step 4: The abdomen Trim the Turkey feather slip and dub abdomen in color of your local Caddis flies. I am using a mix of Golden Olive Hare dubbing and Hot Green SLF. Apple Green, Tan and even Rusty Orange are also valid dubbing colors. Step 5: The Dark Stripe Fold over the Turkey slip to acheive the distinct dark stripe on top of the fly. Step 6: The Rib Trim the excess Turkey. Wind the ribbing thread in about 5 even turns, securing the Turkey in place. Step 7: Wing buds The wing buds are optional, but I believe they improve the look of a pupa. I am using Pheasant primaries, lightly imbued with a flexament. Step 8: Thorax Trim the waste end of the Pheasant feathers, secure them tightly and dub over with scruffy Hare dubbing. The longer hairs you use and the scruffier you tie them the livelier your fly will seem. Step 9: Antennae I like my Caddis Pupae to sport some good sized antennae made of Badger hair. Not all Caddises have them as pronounced as my imitation, so you have to adjust to your local conditions. Step 10: Finish Trim the waste ends of Badger hairs and dub some more Hare to finish off the head. Tie off your thread, covering the knot in dubbing. Take a step back and enjoy! Cheers! J. Quote Share this post Link to post Share on other sites
letumgo 0 Report post Posted July 17, 2010 Great SBS, Jindra! I enjoyed your detailed descriptions as well as your photographs. Excellent job! Quote Share this post Link to post Share on other sites
Gustav F. 0 Report post Posted July 17, 2010 Beautiful fly and excellent SBS Jindra! :headbang: Thanks for sharing. Quote Share this post Link to post Share on other sites
fly_fischa 0 Report post Posted July 18, 2010 Heya Jindra, Very cool tying sequence buddy! You're on a roll, first the czech nymph and now the pupa, keep em coming. Na zdraví :cheers: Quote Share this post Link to post Share on other sites
Firetiger 0 Report post Posted July 18, 2010 Thank you gentlemen, I appreciate your kind comments Karsten: I really like fishing the Caddis, and the pupa stage was badly missing in my SBS sequence - now that it is complete: Nymph = CZ Nymph Pupa = this one Adult = CDC Hackle Caddis I feel much better :lol2: Cheers! J. Quote Share this post Link to post Share on other sites
fly_fischa 0 Report post Posted July 18, 2010 Thanks Jindra, I must have missed no. 3 the CDC hackle caddis. Fantastic SBS's a great contribution buddy. Quote Share this post Link to post Share on other sites
memmnock 0 Report post Posted June 5, 2011 Very nice pattern sir ;-) Quote Share this post Link to post Share on other sites
Stendalen 0 Report post Posted July 27, 2011 Thanks for sharing! Quote Share this post Link to post Share on other sites
P.Dieter 0 Report post Posted July 27, 2011 nice fly and we described A list of materials is helpful though Quote Share this post Link to post Share on other sites
Live2FishNM 0 Report post Posted July 31, 2011 Nice SBS! Thanks for sharing! Quote Share this post Link to post Share on other sites