

poksal
-
Content Count
137 -
Joined
-
Last visited
Posts posted by poksal
-
-
As far as getting started on a budget... many experienced fly tyers have a kit vise or similar laying around and may would give it to a starting tyer who is sincere and will pay postage just to see it get used and help someone get started.
Here is a good consideration to evaluate that is not all that popular at the moment, but is quickly gaining an awful lot of momentum in a hurry. Look into tenkara fly fishing. This kind of fly fishing is most likely going to be VERY popular in a few years, because it catches more fish and tends to shun away from all the complicated learning of modern western fly fishing which these days makes it so difficult, taking us back to basics again. Tenkara is an accident form of fly fishing that was apparently developed in Japan during the shogun period and was taught and learned to be able to eat and survive. Tenkara fly fishing doesnt use any kind of fly reel. Much of the opinions you will hear are not based on facts, so research it out for yourself. This is a serious well established, EFFECTIVE method. It takes much less hardware to fish and the flys are mostly simpler to tie and can be tied with sewing thread and the feathers found in your yard. Some famous champion tenkara fly fishers only fish with one fly pattern, period, ever. Tenkara fly fishing uses a different philosophy in which you seduce the fish into taking the bait. It doesnt use conventional fly line and you usually dont let any line get into the water to spook the fish. You frequently let only a couple of inches or so of the tippit in the water, if any . There are casting methods to learn but they are more natural to pick-up. Tenkara concentrates more on the presentation and less on the fly. A tenkara fisherman believes if you present the fly correctly you can seduce the fish into biting with most any decent fly, having reverse hackles, of the correct sizeof which you can cause to act alive.
I am presently converting to tenkara and continuing to love to tie flys for a hobby. ...AND you CAN use them very effectively while fishing the tenkara method.
-

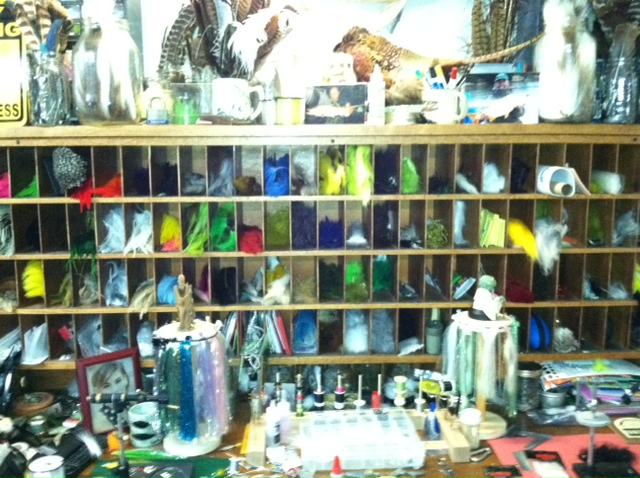
Well, this might not be more practical but it is easier for me. I appreciate your disdain for my use of ziplocks, and if I had to access them more then once a month to fill my cubby slots I too would revile the zippy. In my case the system works. Once a month or so I refill the cubbys, once a quarter I refill the zippys and about once every eight months or so I have to refill my zippys from the vacuum bags. I tie at least six days a week and find it so much easier not to have to pull boxes for each material I need. Your system is very neat and tidy and my wife will never see your bench. I am the "ugly American" tier and don't mind my bench looking like a work in progress at all times. I am really digging how beautifully organized the systems many of you have. I guess it's like everything else in life, we each find a way to create a space that works for us.
Actually.... I think your set-up is kool! .. but won't work for my personality. I'd totally wreck the place with that set-up... and end up with a pile to dig through.
-
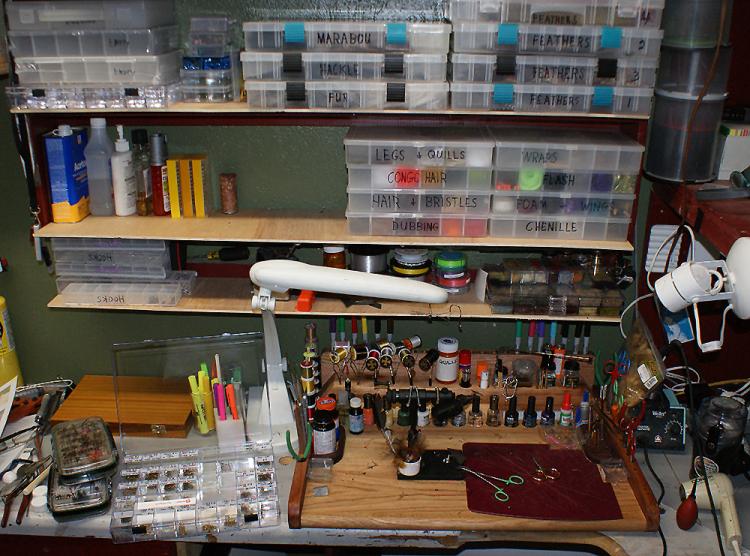
I store all my materials in compartmental clear plastic boxes from the craft stores. I use the kinds that allow me to choose where the divisions divide for larger materials such as hackle, furs, and basic feathers, and marabou. For the smaller materials I buy boxes with built in divisions, for example for my home blended dubbings, hooks, rubber legs, flashings, congo hair, chenille, wraps, beads, and eyes.
I then label the boxes on the front with a marker and they stack within easy reach. In boxes with fur or feathers I put cloves and cedar in the boxes to deter critters. If I change the contents of a box, alcohol removes the marker and I re-marker the name of the new contents.
Hooks are in boxes with about 30 small compartments, with a full information 1/2" x 1-3/8" label stuck in at the back of each compartment where the brand, size, type, configuration, and stock number can be easily read while selecting hooks.
For dubbing blends, I have an Excel sheet that tells me what formula I used to blend each compartment of each box in the stack. So, If I was to use one up I can reblend it literally in a few seconds.
In my humble opinion digging through and resealing stacks of zip-locs sux. With clear plastic boxes, you pull a box from the stack and choose a material form a group of similar, close the box and place it back on top of the stack. The most often used boxes tend to be near or at the top of the stack for a given fly tying session.
There are two exceptions to this method, I keep raw materials for blending my dubbings in zip-locs. I rarely need to get into those zip-locs, if I do it will be for a short time because you can blend a heck of a lot of dubbing colors in a couple of hours. Also, I keep bulk feathers in non-compartmental clear plastic boxes stacked elsewhere, then I keep a selection of those in the compartmental boxes stacked at my tying station and bench. Be sure to add cloves and cedar to those bulk boxes!
Now, a stack of division boxes is a fly tyer's Christmas gift to cherish.
What could possibly be more logical or easier?
-
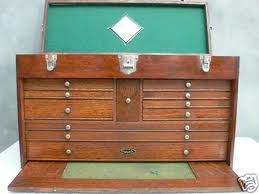
Nice, for one thing is Is nice, and for another it is VERY similar to my set-up. I even have a Gerstner tool box, except mine has the middle drawer at the top to fit the Machinist Handbook. And that tool box is at my back left, because my set-up is at a surround desk. My computer and dual screens is at my back while I tye. My screen with grounds cameras displays at my right shoulder. My coffee grinder, soldering iron, and hair blower are at the right side of my station. Materials are in compartmental boxes on shelves above my station. My station is very simialr to yours.
My version of the Gerstner is like this one, but a good bit more banged up.
-
I use a coffee grinder and have no problems.. either way is fine. If you are blending already sized dubbing you may grind it finer in a coffee grinder if you aren't quick on the pulse button.
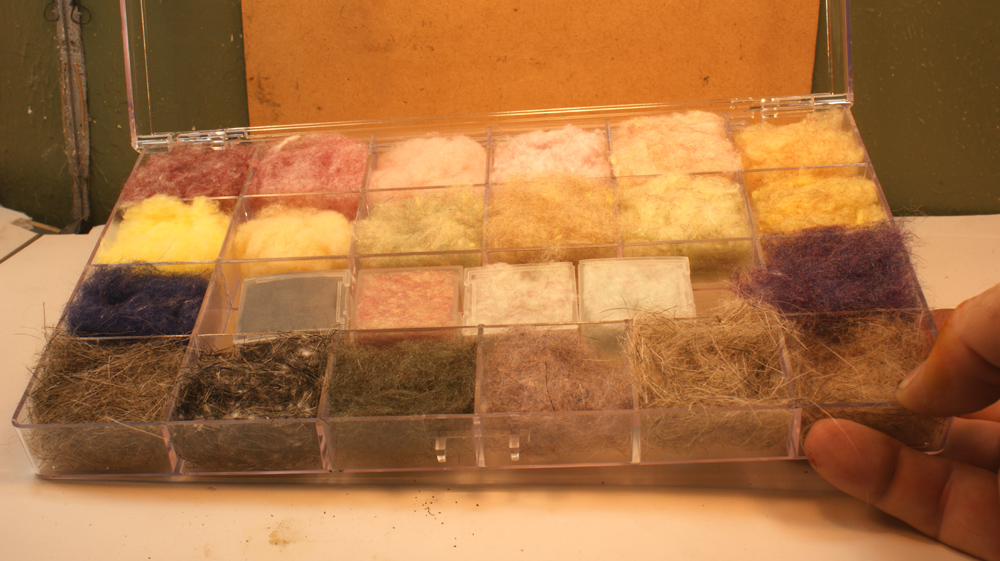
As for keeping mixes one of the following images shows how I keep my dubbing blends. I have three of these containers.
The other photo shows a resource for natural wool roving at JoAnn's for, I think, $1.5 a package of 5" x 3" x 2". This is all the selection my JoAnn's had, if you can't custom mix a color with these... well, you have a problem. Adding in texture such as furs late in the blend is a snap.
I use this most of the time and often mix in various furs and dubbing materials I have purchased from commercial providers. The containers are numbered and I use an MS Excel sheet to track what mixture forumla I have in what compartment. As fate has it under control this is a picture of my worst selection... shrugg...oh well.
To not "wind it around the blades" in a grinder, use short pulses and pause to let it stop whriling between pulses. You have to do this to look at the progress anyway.
To not melt synthetics.... if you use short pulses.. you WON'T. Never just hold down the button on any dubbing mix.. you need to stop and see how it is doing a few times. You will NOT melt any of them if you use this method!!!
You can pick up a coffee grinder from a selection at Wallymart for $20 or less.. I paid under $16 brand new.... and it does an amazing job of it.
-
I like the way you have stored the bobbins in slots and the scissors with just the loops up. Nice new to me concept... I may steal it.
Did you drop a pair or two of scissors and hemostats through the slots before you added the guides?
-
I'd say this is no less a fly that a balsa wood popper. Both have a feather or other material tail. Some of us have been tying mylar braided tube mosquito fish with feather tails. No one has called any names as far as I know. Good for the goose is good for the gander.
-
was a double post .. sorry.
-
Nice desk and tying station. The desk is about perfect. I too do wood working and made my station.
Are those engraved wooden drawer labels? I have a phaograph machine and never thought to make my container lables. What machine did you use?
-
"Wooopeee"
It is the night before Christmas and here at our house
grandmas still cooking, with silver bells on her blouse.
Im still busy at the bench tying tiny flys for next year,
but tomorrow is Christmas, and therell be lots of cheer.
Yes with the bird in the oven, and the pies high on the shelf,
the kids and our grands are all coming, and therell be no stealth.
Therell be plenty of running and climbing and shouting,
Im counting on the grands and their energy no doubting.
As sure as theres a Santa on the shelf with a sleigh,
Ill be putting my prized collection of tiny flys all away.
With the house full with family that Ill be tickled to see,
My feathers will be tucked away just as safe as can be.
My tying station wont fit where my grands cannot see,
So Ill have to hide it in the attic where safe it will be.
With my dubbing and hackle and hooks and all tucked away
All my grands are all welcome to hang with me for a stay.
Though I wonder and am asking you with good cheers,
Could there less shouting without buds in their ears?
Yes, is the night before Christmas and here under our tree,
Tomorrow will bring grands full of energy and glee. Wooopeee
-randy- (poksal)
Merry Christmas or Happy Holiday to each of you and your families from Kaye and I ..... and the kids and grands.
-
I had this idea for a color scheme on a bass popper. I'm bored with fishing season more or less over for me, OK?
I painted a base coat of a metallic color, wanted to run a perfect stripe down the back so I tried using the Painter's Blue masking tape. It took 4 coats of metallic paint to get good coverage, I let it dry for almost 15 hours before I masked it. I removed the masking tape...and half of the base coat with it. Back to square one. I now am planning on giving it a thin sealing coat of something like HaH before trying to mask and stripe the back. Why couldn't I have thought of this earlier? Oh well, live and learn. Has anyone else ever tried to mask a popper body to get a perfect stripe or line? It will make sense when you see the completed body.
It has everything to do with what you are painting on. Modern paints have to have a base coat or be designed to stick to the very product you are spraying, and it must be compeltely dust and oil free. Yes, it may be ok to use an automotive sanding sealer first, but follow that with a primer coat. The sealer has to be compatable with the material you are painting. The primer has to be compatible with the top coat your are painting with. To rephrase, the sealer, primer, base coat, top coat and or clear coat all have to be purchased as a matching system. Gone are the days that any paint can be used with other products. Spray cans from the home repair store will still do this for the most part, but you will need to test to see if you have a good bond to the product.
It may be as simple as the fact that you handled the product with your hands before you painted it. Did you strip all oil first with a solvent that leaves no residue, such as alcohol??
Most folk don't realize that 90% of the time in a paint job of any kind is in the preperation stage & post processes, not in spraying the paint on.
For those suggesting different masking.. no... blue painter's tape is the right tape.. it is not a tape problem but a paint sticking to the product problem. Blue painter's tape is the best non stick to paint tape and it has the true non fuzzy straight edges. One trick is to apply a thin coat of clear over the paint. But if your base coat does not adhear to the product nothing will fix it. Also, if you base coat, or primer, or paint are not compatible, even a well stuck primer or sealer will change chemically and turn loose.
However, I suggest you use a liner brush next time... found at a craft store the one you need is about 3/32" round and 1-1/2" long, AND yes, they are called "liner brushes". Mount the fly and place a steady straight object near the fly. Place something under your had that slides well on the straight object. Trace the brush down the length of the fly while your hand slides down the straight object for a clean straight steady line. Practice first on junk.
Believe me I know... take my word for it. My son is "color me crazy", if you know him you know I know what I'm talking about.
-
My vote is it was a store display for something.
-
Got mine saturday too.. and got all that stuff sorted and boxed tonight.
-
I'm using a DanVise and have tied many many flys at this time.
But hear this. I have recently started doing something that makes a lot of sense. When I was a tool maker years ago we used a trick to hold hard materials in the toolmaker vises. We put paper between the tool steel and the vise jaws. It took a few hook grabs to get the trick down but now I place a magic object between my hook and my jaws. It does four amazing things. It gives me incredible grip on my hooks, let me say that again, I said incredible. It does not do ANY HARM TO ANY JAWS. It does not mark or harm the hook. It prevents me from cutting my thread or tensil on the hook point. That magic object is a small piece of the semi-hard tough clear plastic like most small store bought products come packaged in to prevent shop lifting. I cut a few pieces about 1/8" X 3/8" and fold them in half. Then I slip the hook bend in between the layers of the folded plastic and then put the sandwich into the vise. I have learned to trim that top corner so it isn't in the way and clamp in such a way that my hook point is not exposed outside the plastic. You will quickly figure out your own shape to make them which is best for you. I got the idea by watching some of the masters tie show class streamers using something similar for protecting the hooks from marks. I was so impressed with the grip using less vise stress that I now do that on every fly I tie. The cold fact is we are holding hardened hooks with hardened jaws... this is why we have various jaw problems.... hook after hook after hook until the jaws pay for it.
You owe to yourself to play around with it at least once. At first it is a little cluttzy. Remember, nothing is easy the first time. This gets just as easy as not using the sandwich combo in a few flys.
-
Thank you guys, I stand corrected.
Additionally I welcome the correction as I did what I do not normally do and believed things I had been told. On biological maters I do not have much knowledge with which to discern the good from the bad.
However, please clearify one point. Putting fur or feathers without any meat on them in a sealed bag in the sun is clearly not the same as doing so with a food mass as was suggested.
To be fair to who told me that method, they said it has nothing to do with the heat, it has to do with certain sun rays through the plastic into a sealed container. Does have any bearing on the process? It supposedly has something to do with a radiation induced chemical change in the gasses in the bag and can also be used to kill life forms in water. I flat do not have the expertieze to know. I do know that sun tea sours in a hury.
Additional question, it is my understanding that moth balls are carcinogenic. Any comments?
Thank you again.
-
If you put them in a zip lock and seal it then place them in the sun.. I don't know the process.. but something happens and kills all living processes.
Maybe someone knows the process. .. but something (not just the heat) happens chemically, and there is a name for it. Just in the sun won't do it this process requires being sealed in a transparent container.
I soak all feathers I collect in isoprophl alcohol then let them set all day in the sun in a sealed zip-loc. I then store them for the first few days in a sealed zip-loc with a thimble full of alcohol added. I'm told the mites that feathers have do not transfer to us, but they could affect your feather collection and the pet birds in your home.
I wash all fur collected in a mix of hydrogen peroxide, baking soda, and some dish soap.. then rinse and comb... then in isoprophl alcohol. Then they get the sealed zip-loc in the sun treatement.
I leave the zip-locs in the sun a few days if the sun isn't out most of the time... I want to be sure the sun zaps them with those what ever they are rays plenty enough.
-
For dubbing wax I have several kinds, (professional & homemade) but tend to use what comes in a box at the hardware store as a toilet ring wax seal for less than 2 bucks, by far the most. That ring will last your life time.
have you ever refilled an old lipstick style dubbing wax tube with toilet ring wax??
....YEP!.. or tried.. with my home made mix between the toilet ring wax and rosin. My mix was VERY sticky and the screw would not work. But I have that tube at my bench and use it when I have unruly dubbing to contend with.
But.. no I keep the toilet ring wax in a small clear plasitc flip top box.
..did I answer the question? ... scratching my head...
-
The following is one of the fun things about fly tying... the scavenge hunting. This post will get you started on that part of the hobby.
But first, I'd add some clear nail polish to your list. Wallymart has a brand called NYC, it is cheaper and is a larger bottle than of Sally Hansen. We tend to use "Sally" to mean nail polish. When a fly pattern says head cement or SH or Sally it means use your NYC or whatever nail polish you have. Later you can order a bottle of Flexament & thinner. I tend to use nail polish in clear, white, and clear with glitter. I tend to use black thread the most, the white nail polish is to make a head white. The clear with glitter is for pan fish as an attractor accent. Also, clear with glitter on dragon flys. I tie some bass killing dragon fly flies. For those dragons I use dark brown & dark blue on the eyes, then neon green, neon blue, neon red, & neon orange for body hi lights.
If you have a hobby shop, craft store, or fabric store near be sure to walk the isles next time you go by. MANY items are on those shelves under other names and in larger, cheaper packages. Also, they tend to have a large assortment of various sized compartmental clear plastic storage boxes. You will want to know the sizes they have as you accumulate materials. Don't buy too many storage boxes until you get a grip on what lengths and shapes your collected materials come in.
If you intend to tie some foam body flys you can go to a Dollar type store and buy flip flops for a buck a pair. Select a pair of each color and you will have foam for years. In many parts of the country a selection of foam spider and dragon patterns are a staple section in your “go to box”. Plus, at first these are extremely fun flys to tie up in an assortment of colors. I find yellow body spiders and light blue body dragons are killers. When that BIG fish explodes on a foam dry fly your heart will stop.
For dubbing wax I have several kinds, (professional & homemade) but tend to use what comes in a box at the hardware store as a toilet ring wax seal for less than 2 bucks, by far the most. That ring will last your life time. I filled a small plastic flip open box with some. I also smear a dab on the vertical shaft of my tie vise. This is a good place to stick the quill end of small feathers so they don't float around the room after I have selected them to tie flys.
To get you started the lint out of your clothes dryer will substitute fairly enough for dubbing. It tends to be a bit lumpy but absolutely works. You can select your clothes just a little differently to vary the color. Later order a multi pack which comes with several colors in a compartmented clear plastic box. I like Antron Dubbing Blends by Waspi. Dubbing comes in various coarse, medium and fine lengths, and you can mix them to get additional colors. Start with a medium length selection.
Your craft store will have a feather area with assorted grouped feathers for putting into plastic flower arrangements. Often these will have peacock tail feathers in the group. You want to get one of those selections with the peacock. Lots of flys have peacock hurl on them. That same batch of feathers will likely have some pheasant tail feathers with it, you want those too. The other feathers will provide countless quantities of fibers you can have a great time learning with on the cheap. You will likely get to love a few of the fibers you bought there and will know where to get them again locally.
Tie mostly classic fish catching fly patterns at first and shy away from making up stuff. You will soon toss that made up stuff in a junk fly box and not want anyone to see them. Plus, tying classic proven and established patterns will improve your tying skills much quicker. You will "quickly" love and highly value the skills you are developing by forming good habits with established patterns and can find plenty of step-by-steps on line of them.
For rubber legs, cut open an old bungee cord and you will find an ample supply of the legs inside. Just add sharpie colors or accents.
If you are rural, check out your neighbors' chickens. The roosters often have hackles (long thin feathers on the neck and saddle of the back). You absolutely need hackle feathers to get started tying flys properly. These are great in black, sorrel, tan, and grizzly (grizzly looks black and white speckled but when you look close each feather is stripped). Grizzly roosters are often in the mixed breeds of chicks they get from the farm store. DON'T tell your neighbor why, but buy that extra Grizzly rooster for your next chicken meal, price is not an object. YOU WANT THOSE GRIZZLY HACKLE FEATHERS! ! ! ! ! ! You will not be able to buy them in the shops for several months, they are seriously out of stock. Sorry but, grizzly hackle is a near mandatory key staple in your fly tying inventory. Be careful, many online shops show it as a for sale item but few have it in stock and the ones that do naturally hold it for their established prfessional tying customers. Do not expect to get any.
One of your favorite ladies most likely has a pile of yarn somewhere. Ask for a selection of short (3feet) lengths of each color. You will find them thrilled that someone found a use for their prized pile of yarn they haven't touched in years. These yarns will do at first for a Chenille selection. Even after you buy a selection of "real" Chenille you will still find that pile of yarn a valuable keep. Be sure to check that craft store for Chenille.
In your junk you may have an old relay or door bell ringer or similar. The magnetic coil in those has plenty of copper wire you will charish. For "lead" wire (we don't actually use lead any more) go to your hardware store and buy a spool of fine (thin) solder.
Now add this to the other posts and you should be off to an amazing start!
-
Thanks for the help flytire. I think the fly tying foam would work better it is more dense and would last a lot longer in my opinion. BF
Fly tie foam is just foam in colors in a denisity. The denisity is called weight. You can solve your problem here
-
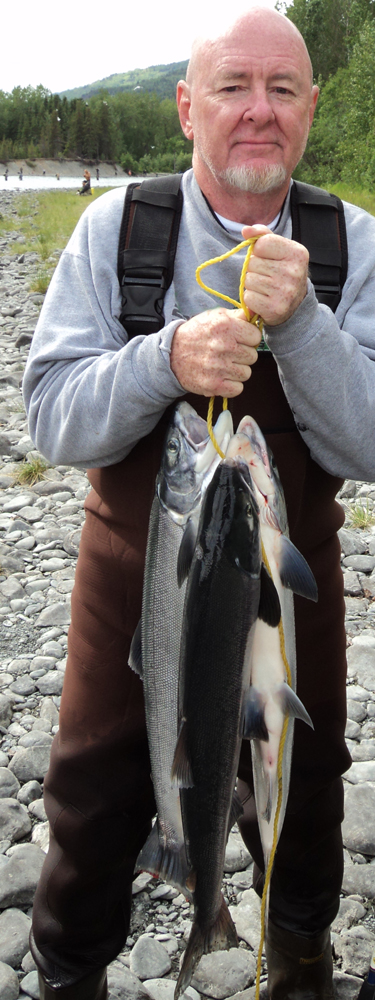
We need to freshen up our fish pictures so I though to add these teasers.
A trio of salmon from an Alaska trip and this large mouth caught and released in the city pond that was reported to me as doesnt have any decent fish.
-
Don't know how good the flick is going to be but the trailer is dynamite, I’m hooked and ready to buy a ticket.
-
got some bear fur, "cinammon" in color.
I'm thinking to get in on this too... what do you need? Give us an idea what you have, don't have and intend to tie.
-
I second the vote for Flexament and the same look bottle of thinner.
Rather than Sally's buy NYC brand and get more nail polish for less money.. I have several bottles of both and can't tell the difference except in the varity of colors. All brands seem to have their own line of colors. The clear is still clear. It is popular with teen girls because it is less expensive which was an intelligent marketing strategy. Teen girls buy a LOT of nail polish.
-
Welcome! where in Texas? .. there are several of us.

 I painted a base coat of a metallic color, wanted to run a perfect stripe down the back so I tried using the Painter's Blue masking tape. It took 4 coats of metallic paint to get good coverage, I let it dry for almost 15 hours before I masked it. I removed the masking tape...and half of the base coat with it.


How to get started in fly tying
in The Fly Tying Bench
Posted · Report reply
Was a double post