Al Beatty 0 Report post Posted April 1, 2008 Hi Group, Some of you are really skilled using Photo Shop (I'm using Version 7) or at least your pics sure look good to me. I'm either fortuneate or unfortuneate depending how you look at it to have Art Directors who will only accept unaltered pics. So I've never really had to figure out (nor had the time) how to do a good job of adjusting contrast, lighting, and sharpening. They get quite cranky if I try doing my own adjusting so I'm just not very good at it. I do a lot of retouching old pics I salvage for customers but I usually end up using the cloning tool to remove blemishes, only use the sharpen filter a small amount, and the lighten/darken of an old B&W pic is pretty straight forward. My questions are, "What sharpening filter do you use? If it's the unsharpen mask filter, what are your settings for "Amount, Radius, & Threshold?" Any other "adjustment" tips would be appreciated. My main reason for asking is I recently got an assignment to shoot several of Dave Whitlock's flies for a book. I completed the shoot and sent off the pics (with no adjustments per directions from the Art Director). I'd like to frame a couple of the shots (along with flies that Dave & Emily gave us) for my personal use but I'm not real pleased with the results I get. I've used this group in the past as my go-to bunch of people who really are quite knowledgeable regarding digital art/pics (I'm really quite skilled at film/wet dark-room techniques but they are past history). If you have any ideas, I'd appreciate your thoughts. Thanks in advance for any ideas. Take care & ... Tight Lines - Al Beatty www.btsflyfishing.com Quote Share this post Link to post Share on other sites
JayMorr 0 Report post Posted April 1, 2008 Al, I would be happy to help you out. What are the results you are getting. Are the photos not sharp enough or are the images grainy? I know other peoples work is sensative but if you would like to email me an example, feel free. I can see what you are working with and give you some pointers. I use the sharpen filter tool. CS3 (latest version of photoshop) lets you adjust the % you use with sharpen. I think 7.0 will let you do the same. start out small on the sharpen with a 10 or 20% and then you can work on increasing if the area needs it. You can use the sharpen tool or filter from the filter drop down. I tend to use the tool because it gives you more versatility and most times a full sharpen to the entire photograph is not needed. Regarding unsharpen mask, are you using this because of the noise or grain that you are getting? Let me know. One thing you could try is to create a duplicate layer on the photo, apply a Gausian Blur, put it to 4.0 and then go to the edit menu drop down and select fade to gaussian blur, select multiply and bump the % down to like 20-30%. It will soften and darken the photo up a bit and you can then go back in and adjust the lighting. Quote Share this post Link to post Share on other sites
Wulff 0 Report post Posted April 1, 2008 Al theres no one answer, each indiviual image can benefit from different sharpening methods. alot also depends on the file size. For example a full sized 8mp image you can be more aggressive with vs a small 1mb image. Also, many recommend 3 steps. Capture sharpening where a very small amount is applied to the original. Sharpen again when your done your adjustments and finally "output" sharpening which is dependant on print size or web display ( 800*500) etc. I myself do two. A general sharpening to the fishished original that leaves room for a bit more and a final to the output based on its size...ex an 800*560 thats being uploaded for web. the trick is not to overdue it. 1) it looks oversharpened, 2) can introduce halos and 3)increases noise. All that said. With PS 7.0 Id use unsharp mask. AMT: Roughly 300% Radius: 0.4 or 0.3 Thresh: 0.0 Another good method with PS7.0 is a layering method for images that might be more susceptible to noise like underexposed images. Dark and Light Blend Sharpenening 1- open original image and make Duplicate copy to protect the original. 2- On the copy adjust your levels, saturation and contrast, as per your regular workflow. 3- Now make duplicate layer and name "Dark Sharpen" 4- Make another duplicate layer and name "Light Sharpen" 5- Select the Dark Sharpen layer and add USM Amount – 500 (400) Radius - 0.6 (0.4) Threshold – 2 (2) 6- In the layers palette set the Blend mode to Darken and set the opacity to 20 % (15 %) 7- Select the Light Sharpen layer and add USM Amount – 500 (400) Radius - 0.6 (0.4) Threshold – 2 (2) 8- In the layers palette set the Blend mode to Lighten and set the opacity to 5 % (5 %) 9- Flatten image 10- Make duplicate layer and name Luminosity Sharpen 11- Select Luminosity Sharpen layer and add USM Amount – 500 (500) Radius - 0.2 (0.2) Threshold- 0 (0) 12- In the layers palette set the Blend mode to Luminosity and set the opacity to 60% ( 50%) 13- Flatten Image 14- Done You can create an action (macro) to run through it. Id start each image at 300%, 0.4, 0.0 and adjust accordingly. You can increase the amount, increase the amount and decrease radius a bit etc to find the amount for each. Quote Share this post Link to post Share on other sites
Al Beatty 0 Report post Posted April 1, 2008 Hi Guys, Wow! What great responses from you both. Based on both your comments I've been much too timid with the % on the Amount of USM. I've been trying to keep it below 100%. I'll try both of your suggestions. Thank you very much for taking the time to help and try to teach an ole guy a new trick or two. I've printed out both of your suggestions for my future reference. Take care & ... Tight Lines - Al Beatty www.btsflyfishing.com Quote Share this post Link to post Share on other sites
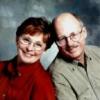
JayMorr 0 Report post Posted April 5, 2008 Al, It has been a pleasure helping you with your current assignment. Here are a couple examples that I came up with: (the images were cropped for linking) With Al's permission, here is the original I went through and adjusted: Exposure Contrast Brightness Added a slight sharpen and Use of Unsharp Mask (radius 3.0 and threshhold 8) and some other JayMorr touches Modified Again on this next set, same techniques Original Modified Al, I will email you shortly with originals so that if you have them in larger format. Let me know what you guys think. Quote Share this post Link to post Share on other sites
Wulff 0 Report post Posted April 5, 2008 Nice job Jay, especially the 2nd. Quote Share this post Link to post Share on other sites
WYKnot 0 Report post Posted April 5, 2008 Jay, I like your adjustments, particularly on the last image (black background). Did you also adjust saturation? The colors are more vivid - or is that primarily a result of the contrast/sharpening adjustments? Quote Share this post Link to post Share on other sites
JayMorr 0 Report post Posted April 5, 2008 WYKnot, I did...however one thing to try is use a blurr and fade it with a multiply, I usually go about 35%. Quote Share this post Link to post Share on other sites