

Ben Cochran
-
Content Count
77 -
Joined
-
Last visited
-
I shoot in Manual Mode +95% of the time. Factually, it can be considered the most creative mode as it positions the full creative emphasis on the photographer, while also passing full EV control to the photographer. Of equal importance is the fact that our meters are also set via the mode setting, via EV (perceived exposure value). Below is a small part of an educational tool that I wrote a while back, cut and pasted, hope that it helps and better explains the complexity of the mode settings. I think you will find that these DSLR cameras have an abundance of "missed or overlooked' amazing built in tools. (The three points of an Exposure Triangle: Shutter Speed; Focal Ratio/Fstop aka Aperture; ISO) .................. Our built in meters are 18% reflective meters or close to the 18% target value. As with all reflective meters, they are not 100% accurate but they are close enough and do work great! Reflective meters only measure reflected light and, as we all know, our environments dictate that there are a lot of variables that influence reflected light frequencies. The first thing that we need to know is: The focal point and/or points also measure exposure values via the built in reflective meter and focusing system. Every time you half engage the shutter release button, for a focus, you simultaneously take a meter reading and this meter reading tells you if you are over exposed or under exposed. Each of the following three settings are simultaneous focusing and metering functions. Matrix: This takes a sample of the whole composition and does its best to give us an accurate average for 18% as the mid point for achieving a focus and relative value of EV (Exposure Value) in the Greyscale. Some recommend using this mode most often and it is fairly accurate. Like any mode and/or setting, there is an applicational environment in which it may work but it is not a practical application for all uses. Center-Weighted: This mode takes a sample from the area around the current focal point's, around the center most point. Again, it measures for an EV that is relative to the sampled area. This meter mode works best for objects or subjects that fit into the active matrix and disregards that rest of the composition, relative to the remaining composition currently in frame. Spot Metering: This mode samples a tiny area in the composition, the point where you place your focus point. This is the most accurate measure of a singular defined area and is the one setting that is most commonly miss used. It is heavily weighted towards placing all of the control back into the hands of the user and gives control for evaluating an EV to be set by the user. It requires more hands on attention, from the photographer, requiring more skill and knowledge. In many ways, it is a kin to a feature for advanced application but very well worth knowing and using. Just as important, if not more so, are the four primary camera modes: Manual, Aperture Priority, Shutter Priority and Program Mode's. As well, is the importance of understanding the effect's that they have on both the exposure triangle and your exposure reading (reflective meter). Many may not know this but with these settings, only one is developed with an extremely important asset; dedicated recalibration and/or adjustment tool for our built in 18% reflective meter. In Manual Mode ONLY, the Exposure Compensation dial functions 100% as a calibration tool for adjusting your onboard reflective meter. Unlike the other modes, it will not affect or adjust any of your currently set exposure values. Here is the list of our built in Mode settings and how the Exposure Compensation dial affects them. P: Stands for Program mode which is an automated mode that will set your exposure triangle to a comparable built in and programed algorithm. The Exposure Compensation function will alter any one of the three points of the exposure triangle, in some cases it may adjust 2 or all of the points simultaneously. A: Aperture Priority will lock in the aperture that you dialed in. The Exposure Compensation will alter the SS or ISO singularly or simultaneously. S: Shutter Priority will lock in the shutter speed that you dialed in. The Exposure Compensation will alter the Aperture or ISO singularly or simultaneously. M: Manual Mode places complete control of the Exposure Triangle in the hands of the user. Additionally and most important: In Manual Mode, the Exposure Compensation is now a 100% adjustment for recalibration or adjustment to the reflective meter only. It will not effect any of the currently dial in exposure settings, only you can or will have to change any of the three points in the exposure triangle. Yes, this is the area where you can actually calibrate your built in reflective meter! Once you have adjusted this setting, via the Exposure Compensation Dial, it will only effect the reflective meter, again in Manual Mode only. If your reflective meter is off by 1/3 of a stop, from 18% grey, you can adjust the Exposure Compensation dial up or down by the 1/3, effectively correcting the meter calibration for a more accurate 18% reading. Once you switch back into any of the other mode's, the reflective meter sets back to its default setting and will be back off by what ever measure you have verified. You can also use this to set you camera so that each time you dial in a centered exposure, the true exposure is up or down by the value that you set your meter to read at. As an example, in Manual Mode, you decide that you want all of your pictures under exposed by one stop. Press the Exposure Compensation button and decrease the meter by one full stop. Once you release the button, your meter has been adjusted to read one full stop below 18% and even though you may be centering your exposure reading, it will remain underexposed by the one stop.
-
 Terje, as always; very nice pics! :)If your camera has the ability to switch between FX and DX, why not just switch to DX format and take advantage of the 1.5 multiplier? These new sensors have more than an ample supply of pixels, which will allow for the extra reach and maintain image quality. Save those dollars for other things that you may really need, as your 70-200mm would have the same field of view as a 105-300mm lens in the DX mode. Hope that helps some.
 -
he he heh..... well, there are two things you need to know, Ben :-) 1. The fly fishing seasons has been delayed due to bad weather conditions and flood. 2. I´m educated as a kindergarden teacher with a master degree in children with behaviour problems. That means that i have lots of experience when it comes to story telling and making up stories like this :-) :-) :-) :-) .. he he he ...... Thanks :-) Terje That explains it and you really did do a great job of telling the story.. Not that I would tell my buddies on Beer night, but I found it very touching and cute. Guess this may be due to the corruption that I suffered from my teachers, during early age development. I will never forget my favorite kindergarden story, as was taught and told to me: "Mary had a little lamb, her father shot it dead. Now MAry takes her lamb to school, between two hunks of bread..." If that wasn't bad enough, there was this version too: "Mary had a little sheep, with which she used to sleep. To Marys surprise her sheep was a Ram, now Mary has a little lamb..." So, the children really are very fortunate to have a great story teller, such as you are Terj. Mine had a lot left to be understood and desired lol... As a full time commercial photographer, I want you to know that your shots really are turning out GREAT, keep it up!!!!
-
OK Terje, I love the photography and the story is cute.... However.... Even though I do not know you, this does not stop a growing concern I am begining to have for you. LOL.. Well done, again!
-
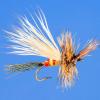
Mr & Mrs Long Legs enjoying themselves :-)
Ben Cochran replied to dryfly purist's topic in Photography Corner
Excellent shots, all of them! You sure are getting the hang of the 105, one of my favorite lenses. Better than your images, I must say that you sure do know how to write a title/subject line that will get my attention. LOL -
Nikon D800 i da house :-) ..... macro test pictures.
Ben Cochran replied to dryfly purist's topic in Photography Corner
Nice pics, Terje, sounds like you are a very happy man. As far as your comment about a softbox: Thought that I would jump in and offer a strong recommendation, for you. The Lastolite Ezybox Hot Shoe Softbox is fantastic, will work great for your macro desire, yet versatile enough to use for other shoots. I, personally, have 5 of just these softboxes and cannot praise them enough! This particular model is designed with an internal baffle that help to spread the light before it hits the scrim, resulting in some fantastic diffused property. When used and placed properly, you will find that the wraparound lighting effect is brilliant. I know that it cost a bit more but they truly are worth every penny, their other products are great too! I have to many to mention them all but will share that the only product, that I am not over joyed with, are their round reflectors, still work good though. Their main HQ is located in the UK and I believe they have been bought out by Manfrotto so, you can find these in the European Market easily. -
Late Edit: I did not read the post above, from Peterjay, prior to my following posting. Just wanted to add that I agree with all that he had to offer. Hey Bill, I do apologize for the confusion, just don't want people to think that larger sensors are always the solution and are always considered an upgrade. One of the main ingredients, for a shoot, will also include sensor size; I consider it during the scouting and preproduction phase of every shoot. I don't want to make this more complicated than what the OP was looking for but the physics applied to the sensor size includes this primary formula named Circle of Confusion (CoC). The CoC is not the same between sensor sizes and within this the crop factor, as we have come to know it, can also be calculated. It is not just a choice of fstop and lenses. As a proper comparison, lets keep the distance at a fixed 2’ to subject and adjust the lens to achieve a comparable field of view. Using Nikon lenses, the sample uses the closest comparable macro lens. Nikon P300 P&S: 27mm - f9 - 2’ to subject DOF = 3.96” - CoC .005 * Nikon D300 DX: 60mm - f9 - 2’ to subject DOF = 1.32” - CoC .02 Nikon D4 FX: 105mm - f9 - 2’ to subject DOF = .6” - CoC .03 * DX format sensor Image will have to be cropped in postproduction due to wider field of view and limits on macro lens choice. Keeping everything equal, the cropped sensor body would require a 70mm macro, giving a DOF equal to 1 inch but Nikon does not make a 70mm macro lens. The important caveat is considered in the fact that the P&S cameras, with macro abilities, are engineered to the camera minimizing the expansion character of short lenses. This is not the case with DSLR bodies and due to that, a crop or postproduction fix may be needed to negate any expansion effect from non flat macro elements. Lighting is a given, trust me; I make my living from creative and proper lighting solutions. Hot lights, constant lighting, is not always the best solution, as the feather is greater than that of strobe; due to radiant spill. What I was stating and am still sharing, with the OP, is to understand that this type of shooting does not require a lot of expensive lighting scenarios but with larger DSLR sensor's, we use strobe lighting or increase our distance-to-subject to help increase the DOF. Perhaps it is just me and perhaps I am now in the category of outdated but I was taught and had to practice the approach of: Get it right in camera. Trust me, there is no way that I could have made it as a commercial photographer and the agencies/clients would have kicked my butt out to the street, had I not been able to get their shoots correct in camera. Granted, I am not against postproduction software and as a matter of fact, I even serve as the admin for the NAPP forums. Even at this, get it correct in camera is just as important as it ever was but the trend seems to be relying on the postproduction software to create and save everything. Giving this nature, my question sits on the premise of: Why spend all of that money on expensive gear when the camera does little and everything is created in postproduction? I understand the commercial demand for counting MP’s but I do not understand the recreational markets obsession with it. It is most important for media destination/print campaigns. If ones image reproduction is conditional and demands a lot of post cropping, I can see the need. If it is due to not getting it right in camera and not really knowing how to use their gear, WOW that sure is an expensive proposition. Truth of the matter, very few recreational shooters really need all of those MP and the fewer the MP’s the better low light/high ISO capabilities of the camera. This gets me back to my main point, in regards to the OP request for best camera per requirements. You do not need to bust the bank to achieve high quality and very professional looking images. Additionally, you do not need to learn how to be a Graphic Designer or Art Director, by purchasing and learning expensive postproduction software. Learn your camera and learn a good inexpensive lighting solution, for in camera shooting. Again, I submit a good P&S, as my comparison illustrates that it is the far better choice, adequate balanced inexpensive lighting solution and save yourself a ton of money. Set up correctly, no one will be able to tell what kind of camera you used and that your shots are all out of camera.
-
For shooting the tutorials, keep in mind that the smaller the sensor the deeper the Depth of Field (DOF) and shorter distance to Hypefocal. What this means: In respect to the same distance to a subject, the smaller the sensor size the greater amount of focus zone or area that is in focus. In the same respect, hyperfocal, the shorter the distance to the point where everything is in focus. The larger the sensor size, the shallower the DOF, which is more often used for artistic effect and may negate (dependent upon lens) that true value of a step by step tutorial. When using a larger sensor, extra expense for lighting and lenses must be budgeted, as constant lighting source needs to be replaced or commingled with strobe lighting or hotter lights, in order to increase the perceived DOF. The best advice that I can offer is: Go for a P&S sized sensor and save yourself a LOT of bucks. IMHO the P&S sized sensor is, by far, the better choice for shooting these types of tutorial's. In addition, you will not have to spend a small fortune on additional lighting and postproduction software.
-
WARNING- Scammer making the rounds on FF forums
Ben Cochran replied to Travis Bille's topic in The Fly Tying Bench
He was actually an NCO in the NG and only served 2 years, from what sources have uncovered. Sounds like you had him during the college fraud round. Google him and you will find that this low life even went as far as to scam people, out of cash, with a story about his daughter having cancer and cannot afford surgery <<< was proven to be a false story as well. -
WARNING- Scammer making the rounds on FF forums
Ben Cochran replied to Travis Bille's topic in The Fly Tying Bench
2 YEARS???? WOW!!!!! My question isn't really about what kind of a monster this guy is but more of why in the world hasn't any of the victimized individuals reported this low life to the authorities? Not only is this type of alleged criminal behavior in violation of several state laws, he is committing multiple felonies by an alleged attempt of purposely conducting wire fraud across state lines. The best way to put an end to this is not just by making everyone aware of it. Shame on the victims for not protecting our communities by reporting this type of illegal conduct to the proper authorities. I have no doubt that forum owners would be more than happy to hand over any supporting documentation(dialogue from the alleged perpetuator) that demonstrates an individual is using the internet for alleged criminal activity. This is how one puts a stop to these sort of creeps! As a DAV, I take offense to those that try to use this status as a means of defrauding others for self gains but the law doesn't prevent some from just being malicious pity jerks!!! -
Yes, as Paul has mentioned, you are going to have some serious issues with DOF. You do not really have much motion blur in the shots, that you posted, to be honest, an extremely small area of the fly fell inside of the focus zone and the rest is outside and out of focus. The majority of your fly patterns are out of focus due to a DOF that is now measured in mm. At these values, your better option would be rails, focus stacking and perhaps bellows. The best route, IMHO, would be to find an older inexpensive non-CPU macro lens and use it. For macro photography, it really is best to get used to adjusting manually anyway.
-
Keep in mind that the truly most important thing that you want to look into is the MTF data on the lens. Not all lenses are manufactured the same and sometimes a comparable lens comes with a loss of quality and falloff in one of the primary gamut wavelengths. The tighter and longer the primary wave lengths, the better tonality of the finals, as they deliver better frequency to the awaiting sensor. Kirk's amazing shots more than demonstrate this. Even though Nikon 105 has VR functionality, the MTF data is superb and it is the quality of the tonality that really justifies the price of this amazing lens. Granted, a lot can be done in post production but upgrading later can cost a lot more in the long run. The older Nikon 105 is also an amazing lens, as well as many of the other older Nikon lenses. The MF data is tight and I, personally, would investigate the MTF data on any lens considered before making a purchase.
-
Red has the longest wave length of any color and this is critical in a lot of commercial photography applications. Granted, for recreational and even some professional applications, it can be adjusted in post production. This is also the reason that MTF data is so important in lenses. Remember that the professional lenses have higher grades of materials and are engineered for best possible delivery to sensor. During the calibration process, they are also calibrated for the best and tightest transfer of the 3 primary gamuts. This is the real reason that pro lenses cost so much more and is actually the resolution, to this gamuts of red issue.
-
Congratulations on your new system Al, sorry that I am a bit late to the celebration party but wanted to add some more thoughts for you. I noticed that you spoke of flower photography and I already know that you will use it for fly and fly fishing shots so, thought that I would add some additional thoughts for you. There is a wireless system that I think you may love, it is the Nikon SB R1 Speedlight System: Here is a link of older information for you http://www.dpreview.com/news/0511/05110102nikonremotefl.asp Adorama Camera still has it http://www.adorama.com/NKR1.html and the SB R1C1 comes with the SU800 commander http://www.adorama.com/NKR1C1.html Now for the nuts and bolts of the application of this system . I have been using this system for several years and do use it on commercial shoots, both fashion and product photography. Personally, I have added additional SB R200’s to fill out the speed ring and use it as a speedlight for either high key or just fill light, both on and off camera. The advantage of the SU800 is the fact that the Radio Popper PX and mini studio version transmitter wil work with the SU800 and with the receivers on the SB900’s, SB800’s, Sb600’s and/or SB200’s the TTL system is still fully functional and the SU800 Commander is 100% fully functional from the camera. This reduces the need for an assistant to manually adjust the lights for you as you can still do it from the SU800 unit. Without the RP’s, the SU800 is still functional but uses an infrared signal, as opposed to radio waves. Applications with set up: With the included SW11 You can both bend and diffuse the light brilliantly. This is great for extreme close ups and delivers great diffused light with very little specular, it also promotes great wrap around lighting. At great distances and for terrific broad lighting, including shooting fat(not actual fat but shoot what is known as shooting fat), there are Sto-Fen omni bounce domes that are available for the SB 200’s and they do a great job as well. The kits come with gels and as a bare light, they deliver a fair amount of good hard light, dependent upon distance to subject. The thing to remember about flash is, every time that we double the amount of equal light source, we increase the focal range, or fstop, of light by one stop. The Speed ring can hold up to a total of 8 SB200’s so, this is equal to a total of 3 stops more intensity of just one SB200 so, it is a very usable and applicable speedring system for many applications. The other advantage is that they are wireless with 3 groups and 4 channels so, they are great tools for creative macro photography, one of the best systems that I can think of for creative lighting in the type of photography that I think you do a lot of. With some DIY gobo’s some very creative lighting and brilliant lighting controls allow for some rather unique macro photography, which would not be possible with any other lighting systems. Hope this helps some and will be happy to add any additional information, fomr my own personal uses and applications for you. As a side, I am using the Nikon wireless systems more and more on a majority of my commercial shoots, not because it is cheaper as my application ends up costing more than going for mono strobes. The advantage is, I can fit 13 speedlights, cables, batteries, gobo’s and gels into “one” 1600 pelican case & be able to design as much better dramatic lighting effect than I can ever do with mono heads. Also, it is FANTASTIC for location shoots, which most of mine are and I hate the stress level that I had with wondering how much of my equipment was going to be lost by the airlines. Hope this all helps some..
-
Kind of late but wanted to toss in a suggestion. it appears as though you need to change your focus to center weighted. (the little dot in the middle for focus setting). It appears that your cameras TTL set focus to the larger subject, which is the cork. Keep the DOF the same but focus, with center weighted, on the fly only and it should add a bit of blur to the front of the cork and really make your fly pop. Had nothing to do with the amount of light, as even the top of the cork spiked. It appears that your focus is set to matrix and that is not a good choice for macro. On your camera, they call it :Multi 5 zone, (which is matrix) or Center zone (which would be more of the center weighted).I am pretty sure that you were probably set to Multi Zone and that is why the focus is more on the cork. Hope this helps and sorry so late in reply.