Jump to content
Fly Tying
Sign in to follow this  
djgunter

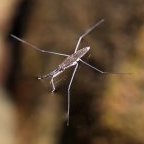
What's the best aperture size for photographing flies?

Recommended Posts

I would like to know your most preferred aperture setting for photographing flies. I would like to show the true detail and not just focus on one point or area of the fly, usually being the head.


Tell me yours!


Dan

Share this post


Link to post
Share on other sites

I turn my Canon Powershot to its Manual Setting and adjust the f-stop to f8, the smallest aperture available on this camera. This will ensure the greatest depth of focus (which I figure is only a couple of centimeters when using a close-up lens.)

Share this post


Link to post
Share on other sites

My Nikon seems to stop at F8 also. I tried being a bit more manual with it upto f22 but I need a better macro lens to get this I think. A friend who works in photography has offered to lend me his pro macro set (which is Canon) so I will try to knock up a set of flies and make the most of my time with it. I'm finding the photography great for improving my flies. Picks up all the niggles that I can't (or choose not to) see with the eye.

Share this post


Link to post
Share on other sites

I use an old Vivitar (FD) mounted on my Canon Rebel Xsi with a converter. The auto focus will not work with the converter, but I get more settings that I control this way. My best photos, in my opinion, come using the aperture set at either 4 or 5.6,and the ISO set at 400. My lighting is simply 2 swing arm lights, 1 with an incandescent bulb and the other with a spiral bulb. Sometimes I will use my box to get the extra light from the foil reflectors. I finally picked up a tripod so I am finding a little less blur in my shots from shaking..

Murray

Share this post


Link to post
Share on other sites

There are some variables to consider.

Most of the time for having all the elements of the fly in full focus, I'm between f5.6 to f13.

If I'm shooting a fly that is perpendicular to the lens, and doesn't have many parts sticking straight out at the camera, I can get by with a shallower depth of field like a f5.6.

If the fly is angled toward me or has appendages such as silicone legs or palmered hackle sticking out toward the lens, I may need to go up/down to f13 or somewhere between.

With small apertures usually requiring slower shutter speeds for most indoor lighting situations, a tripod is almost mandatory.

Don't know if that makes sense or not. Basically, the size of the fly matters as does the angle of the fly and the amount of materials sticking out from the hook.

I guess the best example of this would be if you were taking a picture of a flatwing streamer such as a Grey Ghost that was perpendicular/flat to the lens, you could get away with a pretty shallow depth of field like an f4 or f5.6 or even shallower.

However, if you were taking a picture of a Wooly Buggar with rubber legs that was in the same perpendicular position to the lens, you would need to use an aperture with a greater depth of field like f8, f11, or f13 to have the whole fly in focus. (I may or may not be using the correct terms when saying smaller and greater depth of field.)

The reflectors that Murray mentions are a big help in illuminating your subject.


Kirk

Share this post


Link to post
Share on other sites

Here is my set up for shooting macro, including flies:


1. Canon DSLR with 100mm macro lens.

2. Always shoot with a tripod & shutter release.

3. Set Av to f/8 or f/11.

4. Set white balance to "daylight" and turn off all fluorescent or tungsten lights.

5. Use an LED macro ring light, with at least 2 additional fill lights with daylight bulbs. Turn off camera flash.

6. Use a neutral background board such as med. blue, gray, or green.

7. Use manual focus on lens, AF will not work, at such short distances.

8. Set ISO to 100 to eliminate "noise".

8. Bracket the exposure at least 1/2 stop each way.

9. Experiment using a circular polarizing lens to highlight colors.


After shooting, if you have Photoshop, or Microsoft Photo Gallery/Merge, try merging all 3 exposures into a HDR image.


Macro lenses are pretty pricey, but you can use a 50mm to 80mm lens with a macro lens extension ($30 +/-) between the lens and camera.

However, focus will be difficult to obtain, and very critical. Will take some trial & error work.

Share this post


Link to post
Share on other sites

Thanks guys,


I purchased a new more flexible tripod yesterday and I'm looking forward to using it. Just hard to find the time these days!


I might have a go at focus stacking with Photoshop and see how that goes as well. Will post some pics soon and you guys can tell me what you think, I'd love some feedback!


Dan

Share this post


Link to post
Share on other sites

Here is my set up for shooting macro, including flies:


1. Canon DSLR with 100mm macro lens.

2. Always shoot with a tripod & shutter release.

3. Set Av to f/8 or f/11.

4. Set white balance to "daylight" and turn off all fluorescent or tungsten lights.

5. Use an LED macro ring light, with at least 2 additional fill lights with daylight bulbs. Turn off camera flash.

6. Use a neutral background board such as med. blue, gray, or green.

7. Use manual focus on lens, AF will not work, at such short distances.

8. Set ISO to 100 to eliminate "noise".

8. Bracket the exposure at least 1/2 stop each way.

9. Experiment using a circular polarizing lens to highlight colors.


After shooting, if you have Photoshop, or Microsoft Photo Gallery/Merge, try merging all 3 exposures into a HDR image.


Macro lenses are pretty pricey, but you can use a 50mm to 80mm lens with a macro lens extension ($30 +/-) between the lens and camera.

However, focus will be difficult to obtain, and very critical. Will take some trial & error work.


Thanks for the tips.

Share this post


Link to post
Share on other sites

Hi Dan,


A professional photographer friend told me that many lenses loose sharpness at smallest apertures. I didn't believe him, so he told me to do a test, shooting, say, a page of small type, at every aperture to see where the sweet spot is for sharpest detail. To my amazement he was right. The sharpest results often happened in the range of f/8 to f/18, believe it or not (as Kentucky and others said earlier in this thread). But each lens is different, and you won't know for sure unless you do the test shot at each aperture. Sometimes it is worth sacrificing a bit of DOF in order to get the fibers sharper. So don't assume that the smallest lens opening is always the way to go.


The other thing that is not widely known is that on SLRs you can achieve significantly better sharpness with an economical 50mm f/1.8 normal lens ($120 new from Canon, for example) and extension tubes (Set of 3, $89) than with the more expensive macro and zoom lenses. The more glass the light has to travel through, the less sharpness, and the macro lenses have a LOT more glass. The extension tubes have no glass. Just empty tubes that increase the distance of the lens from the sensor screen for close-up work.


The only advantage of the more pricey macro lenses is the ease of zooming in and out. But for shooting stationary flies, that advantage is not worth the extra cost and the loss of detail IMHO. I'm fine with having to change the extension tubes when I go from shooting a size 10 to a size 18 flies. Extension tubes come in sets of three, each a different length (12, 20, and 36 mm), with a total of seven different combinations: A, B, C, AB, AC, BC, ABC. Once you get used to changing the tubes to get optimum framing of your fly on the sensor, it becomes easy and routine. And if you are shooting mostly similar size flies, then no changes are necessary.


Here's a fly I shot last night using my tiny 50 mm lens at f/18, instead of the smallest f/32. Depth of field is acceptable.


And in case you're interested:

Hook: 14 Grip 14723BL

Thread: Pearsalls light olive silk

Hackle: Honey dun hen

Tail: Cream cock barbs

Abdomen: Corticelli buttonhole twist 3010 pale yellow, two strands (out of three)

Thorax: Golden seal cut medium, on black Pearsall's silk (Clark spinning block)


RoscoeGoldenDun_6003Lo.jpg

Share this post


Link to post
Share on other sites

I did not realize why the tubes ended up with clearer pics for me, unfortunately i mangled my tube up on a lense it did not want to let go of...guess I'll be saving for another now...

Murray

Share this post


Link to post
Share on other sites

Thanks, I'd looked at the tubes and couldn't believe that they would be ok for the money. You've helped me decide to get some. I've also heard about them sticking some times, was advised to use a little wax on the thread before twisting together? anyone know a better option.

Share this post


Link to post
Share on other sites

Piker - I use cheapy tubes instead of spending all the kid's lunch money for a nice macro lens. Really like them, just the thing for photographing stationary things like flies. If you want to try bugs, put them (the bugs)in the freezer for a couple of hours - really slows them down and much easier to photograph.


Well, I decided to go with the more expensive tube set made by Promaster. The set of three precision tubes with two caps to keep dust out lists for about $230, but can be had used for $150. Very easy to take on and off, and they have the electrical connections between lens and camera to enable the autofocus, although I don't use that. Instead I use a focusing rail. It attaches to the tripod, and then the camera screws securely onto the rail. Just turn the knob to move the camera slightly to and fro until the focus is perfect. Can't imagine doing the macro work without this now.


Focusingrail.jpg

Share this post


Link to post
Share on other sites

Kenko extension tubes are probably the best there is. A set will run you around $200 +/-, but have great reviews from the pros. What ever brand you buy, make sure you check out the electrical contacts on the tubes with your camera & lenses before you purchase. Some work and some don't!


The slider rail is also a great accessory, in that they allow you to make very small adjustments to the focus without disturbing the camera. At macro distances, focus becomes critical, since DOF is reduced.


Bill

Share this post


Link to post
Share on other sites

Join the conversation

You can post now and register later. If you have an account, sign in now to post with your account.

Guest
Reply to this topic...

×   Pasted as rich text.   Paste as plain text instead

  Only 75 emoji are allowed.

×   Your link has been automatically embedded.   Display as a link instead

×   Your previous content has been restored.   Clear editor

×   You cannot paste images directly. Upload or insert images from URL.

Loading...
Sign in to follow this  

×
×
  • Create New...