
FisherOfMen
-
Content Count
23 -
Joined
-
Last visited
Everything posted by FisherOfMen
-
Thanks guys! I've been having a lot of luck with mice patterns. I'll be fishing some dries, and not getting any big ones so I skitter a mouse from bank to bank, and get very aggressive rises from the larger trout, giving up their positions. I've never hooked larger than a 12 inch brown on a mouse, but they're effective at giving up the position of the bug guys so I don't have to narrow down their positions. Helps me learn "advanced" water reading, too! *I've heard a TON about the Moorish Mouse, apparently most AK guides swear by that pattern and some even use it exclusively. After reading a 4-page article about it, I'm convinced its a good tie!
-
Hey all - I've been trying to target those giant browns, and a local guide suggested skating a mouse. I've tied a few "mice", just a ton of spun deer hair on streamer hooks. What is your favorite mouse pattern?
-
Hey guys, so with some help from a local guide I've finally started catching some trout. Anyway I've heard a little about tying caddis adults a certain way: Tie it like an Elk hair, only use deer hair and tie it reversed so the tips are tied in, not the base. I only tied one, and the trout in these Adirondack rivers loved it! I think I might know why - When you pull the fly under at the end of a drift, it bobs right back up, possibly imitating a hatching bug surfacing. I caught two respectable browns (for me) with it, then lost it in a tree. I tied on a regular elk hair caddis, and fished it with no avail for fifteen minutes amidst plenty of rises. I'm a newbie, so is there anything valid in my hypothesis that the trout like how the (nearly unsinkable) reverse deer hair floated back to the surface? In any case, the deer hair makes this one amazing fly. It is durable, floats like a cork, and is actually easier to tie. It's my new favorite dry!
-
Nope. Just running, pushups, and getting yelled at. Might sound odd, but I can't wait!
-
Better make that Christian-flytying-highschool-flyfishing-homeschooler! Gotta love Matthew 4:19, hence the username "FisherOfMen". Although I'll only be in the homeschool category until Thursday. Then I'm free! (till college) -Shipping to Ft. Benning, Georgia on August 14 for Infantry OSUT. Then 16 weeks of no fishing
-
Books are very good references, but don't forget you're in the 21st century! I learned most of what I know from the internet, and it is an invaluable resource. Books usually go more in depth, but the net has endless chains of links to navigate. This is especially useful if there's things you don't understand - just go to youtube and find a video of it! This is exactly what I did with spinning deer hair.
-
Good tie there, Hans. And a mark of the true Samurai - 12/0 thread!
-
Thanks! I've finished an adult green sedge and it took close to an hour! I couldn't get the legs right so I finally ended up just having four, not six! I was using moss green 50lb braided fishing line and I didn't leave enough room
-
There's no real need to go through any high-tech preservation in my opinion, but my opinion doesn't matter much. A very good portion of my tying supplies comes from my winter entertainment: hunting. Deer, grouse, cottontail rabbit, snowshoe hair, gray squirrel, red squirrel, you name it, I've used it for fly tying. For every (small) animal I skin it and nail the skin to a piece of plywood, stretching it as I go along. I let it sit for usually a week or a little less if I'm feeling impatient. The result is a pliable but very dry parchment skin. I have never had problems with decay or bugs, keeping them in cardboard boxes. For birds, like grouse, just keep the flesh side-up when drying. Grouse are thin skinned and they're usually partly dry by the time I'm done nailing them to the board, but I give it a good couple days before doing anything just to be sure. But, like I said about my opinion...
-
I have heard from expert tyers to stick with a Gold-Ribbed Hare's Ear in 10-16 and Pheasant Tail in 14-20. I would agree that this is pobably one of the best selections for simplicity and effectiveness. Don't be afraid to add your own variations onto these two flies, either. Doing so will expand your arsenal without much effort.
-
Hey guys I'm Nick Downey up here in the Adirondacks of NY. I'm from Star Lake, and live right on the lake with the 300 acres of fun about 100 ft from my front door. I've been fishing most of my life, with no real instruction or passion, but two years ago my uncle gave me his old boat and I've been on the water every free minute I had since then. I hit the bass real hard the first year, and last year started for those rainbows. I really love trolling deep for those guys because its so exciting - you never know what's on the other end of the line. Late last year I got into fly fishing. I was just getting into it when fall arrived, and winter has left me itching to catch some trout. I'm focusing mostly on the rivers and streams around here, not really interested in fly fishing all that much stillwater, except for certain circumstances. Now I'm compltely obsessed with fly fishing and am anxious for my first real season of flyfishing to start in 5 days on April 1! Here's a picture I snapped a minute ago showing the view from the upstairs office where I do my schoolwork(homeschooled). You can probably guess why I get my schoolwork done a lot faster in the summer! -Don't let the sunshine fool you - it's 23F degrees outside! That's my boat, a 12 ft. aluminum clunker from the 60's... But she floats! Motor is a Briggs 5hp and runs "most" of the time;) This boat was my great-grandfather's so it's been in the family for awhile. So I'm a newbie Fly Fisherman & Tyer. Got the passion, lack the experience!
-
Lookin' good! What kind of hackle is that?
-
Need help with starting dubbing on thread
FisherOfMen replied to kentuckytroutbum's topic in Beginner's Corner
I agree with the previous posts. Using less and less dubbing will get you that finely tapered body that I struggled to master for as long as I've been tying. I still have to remind myself to go easy on the dubbing, especially when using non-synthetics that tend to clump more when you roll it on the thread. -
I like the looks of the middle one in the first picture. Hopefully it's as effective as it is an eye-pleaser.
-
I just read a book on fly tying I got from the library, "Mastering the Art of Fly Tying", can't remember who it was by, but it touched on the subject of hookset angle being determined by eye angle coupled with hook point angle. You're on the right track anyway. The only reason I use straight eye hooks is to keep my head neater on some flies. Don't ask me how this helps, that is probably something in my head!
-
Those are some good beginner flies. Don't take me the wrong way, however. Your heads and overall "neatness" need some work, but everyone's did when they were starting. Don't get discouraged if your flies don't look exactly like they're supposed to. I got some good advice from a fellow tyer when I was starting, went something like this: Tie 1 doz. of a fly that is effective and relatively simply, ie. Gold-Ribbed Hare's Ear. Tie these with a picture of the pattern right in front of your vise. Go slow, first one shouldn't take less than 1/2 hour. Pay attention to tail length and thickness, body thickness and most importantly, taper. The thorax and shellcase are the hard parts. Just settle for what you can do your first time, excpect it to be a messy bulge. Get a head that doesn't hide the eye. Repeat 11 times. Next, take a razor blade or knife and cut everything off these hooks. Study the patterns again, and repeat the process of tying 1 doz. Gold-Ribbed Hare's Ear. This time keep in mind the taper most of all, and again don't worry about the thorax much. Go slow. Finish with the best head you can manage. Repeat 11 times. Now cut everything off again, and tie them all one-by-one. After my third dozen I went from a total newbie with no tying experience, to a newbie that knows what mistakes I commonly make, knowing how to get the fur and thread to do what "I" want, and how to know what makes a good fly. This excercise alone should take close to a week depending on how much free time you have, but it is the best tying lesson I can think of. Hackle comes next, but you are familiar with material manipulation now, so as soon as you understand the technique, it should come easily as well as with every other technique in fly tying. If you follow this somewhat grueling exercise, I guarantee you will excell very quickly with your tying skill. Nick P.S. Just don't give up!
-
That will catch something! I like how you used minimal supplies and managed to create something respectable. The body looks very classic, and the wingcase managed with the same bit of material (I think) is good thinking. Is the little bit sticking up antennae, legs, or what? I've seen it on some other flies, so I guess its effective. Now go zap some fish with it!
-
I stick to cardboard boxes because it's what was handy. I've heard down south plastics can be a no-no as they create moisture. Other than that cool, and dry is the key. Shouldn't have a problem with bugs unless you keep your supplies in the garage.
-
Technically you can use anything. I started tying with my mom's sewing thread without a bobbin. I make a few wraps, then anchor with hemostats before fixing my grip and proceeding. Took 2hrs a fly or so. I had just started, had no idea what I was doing, and was DESPERATE! Most people suggest 8/0 Uni for most everything, going to 6/0 for hoppers and small streamers, then 3/0 for huge stuff and bass bugs. This seems pretty reliable. It all deends on preference. If you have a bit of a heavy hand, use 6/0 to start. I use cheap Gander Mtn. 210 denier and can keep heads small enough down to a size 16 dry.
-
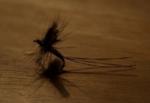
I'm a newbie tyer, too. I personally whip finish, I have both a Thompson and a "Matarelli" I think it's called. Really all you need is a knot to hold it all together, but I think the best part of whip finishers is that you can use them to make a super-smooth head. I still sometimes make not-so-neat heads, and whip finishing can be used to counteract a sloppy head as well as provide superior strength. (I don't cement my heads, just haven't gotten around to getting any yet:P) This head on my JailBird Streamer below started really crappy but after two whip-finishes it's as smooth as a baby's bottom with no head cement. I've gotten compliments from respected tyers just on the great head!
-
Groundhog hair good for anything?
FisherOfMen replied to Greybull River Rat's topic in Beginner's Corner
Hair from anything can be useful. Up here in the Adirondacks we have red squirrels (tree rats/pine squirrels) instead of groundhogs. I shoot 'em just to keep them from castrating the gray squirrels, and their tails are great for anything, esp. streamers. The fur is beautiful dubbing, with a reddish orange tint. Use what ya' got! -
My first every fly - tied a simple clouser
FisherOfMen replied to Dave Pamenter's topic in Beginner's Corner
Those flies are amazing, but then again my opinion might not really matter... (I'm a newbie, too!) Clousers are supposed to be sparse, but that one looks great, it seems very balanced and clean with the distinct red/white split down the middle. I like it, looks to be a very effective fly. That's what you're after, after all. Let the fish be the final judge. This was my first one so don't feel bad -
Hey guys, first post! I'm homeschooled and have an assignment to put together an art project consisting of flies for every life stage of both mayflies and caddisflies. I'm not that great of a tyer, (sp?), and need help with making realistic caddisflies. I've already worked on the mayflies, and using extended bodies and my secret recipe cut wings has helped a bunch. However I've no idea how to spruce up your average caddisfly. Any pattern reccomendations? Thanks! Nick