tidewaterfly 0 Report post Posted December 19, 2014 Eric, that's pretty slick! I didn't notice the trailer hook either! CJ, my view of the hook positioning is about as Shoebop has described. I agree with him about the problem that new tiers often having with hook sizing & positioning & restricting the gape too much. CJ, the last pic that Eric posted with the foiled pencil popper bodies is a good example IMO, of how the hooks should be placed relative to the body. I like the hook point to be approximately at the back end of the body, or slightly further back. However, I've used longer shank hooks too, so that the point is even further back. Sometimes it depends on the popper body style too. My preference is to also set the hook in the body as low to the bottom of the body as I can get & still get a durable mount. As I said previous, I also like the biggest hook I can place in a body & still have it float properly. In that regard, & for example, some of the Wapsi Perfect Popper hard foam bodies that specified size 1 or 2 hooks, I'll use 1/0 or 2/0 size hooks. This is only my personal preference & has been established from trial & error. Other folks may like their hooks better in other sizes. Here's some sliders I made many years ago. Late 80's or so. They're not pretty, but they caught plenty of fish. The bodies are cork, and I believe they were intended for size 4 or 2 hooks. The hooks I used are the older Mustad 33903 which has fairly long shank & these were 1/0 or 2/0 size. Notice there's plenty of room between the back of the body & the hook point. This was at the time a very cheap way to make a floating bug! The hair is from the back or bottom of a bucktail. The hair that flares out easily. These were made specifically for a fishing trip to the Potomac for Smallmouths. Here's some various type bodies & shows the hook position & gape pretty well. The one chartreuse popper with the green tail material was purchased, the rest were made by me. Here's basic popper made from a bottle stopper. This one is big, with a 5/0 hook in it. Another basic style, round foam cylinder. The hook is a 2/0. There's a glass or plastic worm rattle inserted in the back side of the body. I use these for Striped Bass primarily. Although not a popper, this is a good fly to have & easy to make. This is my version of a the Gartside Gurgler. This one is on a 2/0 size hook, but they can be made in any size you wish. The original has a tail of bucktail, which I'll also tie, but I like the hackle tails best. The body is craft foam over Estaz with a hackle collar. Quote Share this post Link to post Share on other sites
ditz2 0 Report post Posted December 19, 2014 I started my fly tying hobby in about 1968 with small poppers for sunfish...1/4" dia. cork cylinders with calf tail tails and a hackle wrapped between tail and body. The cork was epoxied to a mustad kink shanked hook. I only remember ever tearing a body off of one hook and it still had some cork attached to the hook. I sometimes now make them from 2mm craft foam. I use a paper hole punch to make 1/4" disks and I use c/a to glue 4 of the disks together to form a small cylinder. Then cut a shallow slit in the bottom of the cylinder. Insert the hook and use either c/a or better yet epoxy to glue it then add the other materials......I don't paint these. I use the color foam I want the popper to be. Paint chips off when they bounce off of rock and trees. Balsa and cork both work well but it is best to paint both of these. On these small poppers it is possible to put enough paint on them to make them slow sinkers. I use 10 or 12 kink shank hooks in these small poppers. I don't make many small popper for sunfish anymore. I now prefer craft foam spiders to the poppers and they are easier and faster to make and seem to work a little better for me. Quote Share this post Link to post Share on other sites
heavynets 0 Report post Posted December 19, 2014 If you want your poppers to really "POP", use a Gary Krebs jig. They make a perfect popper every time. Quote Share this post Link to post Share on other sites
Guest Report post Posted December 19, 2014 Posted this years ago...... pretty simple with basic tools. Lotta this stuff like the cork,feathers, doll eyes, paint, hooks, rubber legs didn't come from a fly shop. Mostly the wifey's chickens running around and Wallyworld....Main thing you can make what you want...Anyway, hope this helps a least one tyer... I start out with some small corks from the hardware store/hobby lobby and cut, shape with emery paper, razor knife. Balance the corks to the size of your hooks. Next I take some bendable worm hooks from Wallyworld and make hump shanks out'em and split the bottom of the corks and line with thread and glue them to the hooks. After a day or so for the glue to dry I paint the bodies a few times with some Testors paint from the plastic model section of WW. You'd be surprised at some of the hot colors they have. After a day or so after the paint coats are hard put'em in your vice and tie in saddle hackles for tails, with flashbaeu, crystal flash, rubber legs, etc. Then tie in a couple of hackles and wind around the hook and whip finish(bunches of half hitches will work) right behind the cork body. Dab of cement /glue. After you do the tails take a pair of pliers and some of your rubber legs ( mine came from a jig skirt making kit from BP Shop) and using a large enough needle to get the rubbers in the needle eye push them trough the cork at angle from back to front and each side. The legs I have are matted together so I leave 2 or 3 together for a stouter leg. This is tricky and sometimes it all screws up and you gotta start over. Soon you'll get the hang of doing it. Now you can get some glitter fingernail polish and jazz'em up, glue some doll eyes (also from WallyW), dabb on spots, whatever! I skipped a step that you can do after you get the hang of it. That is before you tie your tails on and hackle tie in couple of strands of 20# mono on the back of the hook bend and when finished start your thread on the hook eye and bend the mono just right and tie off at the hook eye. With a little practice you can learn to seperate the 2 with just the right bend to make the popper weedless! Hope this helps someone. Later DL PS: Quote Share this post Link to post Share on other sites
Guest Report post Posted December 19, 2014 Bream poppers w/ hard foam boddies from basspro. No paint needed used bait hooks Quote Share this post Link to post Share on other sites
Guest Report post Posted December 19, 2014 Balsa and cork saltwater poppers The balsa felt weak like it might split so wrapped thread and then sealed. Quote Share this post Link to post Share on other sites
pop-n-bug 0 Report post Posted December 19, 2014 For painting you can get some cheap nail polish to paint the bodies with. Then put a coat or two of sally Hansen hard as nails as a clear coat. Craft paint also works good to paint the bodies. Stippled Popper show how to do some top notch paint jobs. He is the man! Quote Share this post Link to post Share on other sites
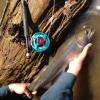
Guest Report post Posted December 19, 2014 Weedguards Quote Share this post Link to post Share on other sites
tidewaterfly 0 Report post Posted December 20, 2014 For painting you can get some cheap nail polish to paint the bodies with. Although this is great advice, as nail polish can be an inexpensive & great way to color poppers, do be careful with using it on some types of hard foams. The solvent in the nail polish could dissolve the foam. Been there & done that! It's best to test it before you go full tilt into painting & discover a few hours later the popper body is a glob of melted goop! Same can be said of some types of paint too! Quote Share this post Link to post Share on other sites
cjsnyder1234 0 Report post Posted December 20, 2014 Where should I start? I could now wright a small book with all this great info! Those jigs are the ones I saw and im leaning that way for my bass/pike poppers. For panfish I'll stick to pre made heads. Hooks well I see I have plenty of options but 2-4x long shanks wide gape will more then do just fine seeing as I have thise on hand. Painting and clear coating someone posted a Wright up witch I will be reading when free time comes around thanks for that one. Tails not to worries plenty of rubber legs and feathers laying around as well. The only real investment is the boddy foam and jigs at this point ill see what I can get but I'll have more to report after christmas. Can't go out and place to big of an order right now seeing as I bought myself a new regal with stainless jaws for X-Mas. What can I say you guys really know what you are talking about and I have say I am so glad I joined this community of tyers. I will report back after the holidays with my final out come of my popper endeavours and maybe a few finished flies as well! Time to find an online shop and fill up a poppers wish list! Merry Christmas and happy new years! -Cj Quote Share this post Link to post Share on other sites
Stevester 0 Report post Posted December 20, 2014 CJ, It is great that you want to get into making poppers. I will caution you about one thing if you live in a small place. Unless you live alone in that place sanding balsa, cork or foam will have you looking for a bachelor place in short order. So will using a spray system with out covering everything within a 10' radius. Don't ask how I know. Steve Oh, and DenDuke, I got's to have that last fly picture! Quote Share this post Link to post Share on other sites
FlaFly 0 Report post Posted December 20, 2014 Boy! I leave the house for a couple of hours and there's a whole page full of posts since I left. One thing I wanted to point our about ten posts back, when Shoebop was discussing blocking the hook, is way back when I first started tying poppers, I could buy cork popper heads. They had a groove cut from front to back along the bottom... real easy to stick a crookshank hook into. Heads I've bought more recently from BPS and others are hard foam, and have a hole drilled right through the very center, so it's natural for novices to stick the hook through that hole. It's in entirely the wrong place, unless you go out of your way to purchase wide gape hooks. I just go ahead and use a razor blade to cut a slice in the bottom the way the old heads were made. I don't know if anyone makes modern heads with the hole drilled closer to the bottom but I'd sure like to find out. Quote Share this post Link to post Share on other sites
Guest Report post Posted December 20, 2014 On the foam readymade bodies run big needle thru hole in tail and out just above the bottom of the front. Stick the hook eye from the back to the front and go past apply glue and slide/ set. Don't use hump shanks. I think cork is strongest, balsa smooths sanding and styro foam is paint sensitive.. When glueing bodies to hooks might have to apply a few times/ dry to fill crack completely. And contrary to popular belief you can build'em purdy strong w/o special humpback hooks which are way to long for some apps. Big bass poppers can be made w/sharp worm hooks that are bent for humps. Not all hooks are bendable though.... You can get sparkle flakes for the fingernail polish and even some come w/ glitter. +1 on stipple popper best around for nice paint jobs! Another point... Good rule of thumb in all your flies try to stay sparse with mat'l for cast ability and get plenty of bite in hook gaps for catch ability.... Frogs... Quote Share this post Link to post Share on other sites
mikechell 0 Report post Posted December 20, 2014 I don't bother with painting poppers. If they look really good, you'll get lots of fly anglers. If they fish good, they might not catch many anglers, but they will still catch fish. I use flip flops to make the heads. A metal tube, sharpened on one end, will cut round heads from the flip flops. Quote Share this post Link to post Share on other sites
teamtrout 0 Report post Posted December 20, 2014 Lots of good advice on here... I'll try to add a little. If you look around, you will see some with rubber legs, some without. It doesn't really matter, but I like them, especially on bluegill poppers. 'Gills are suckers for rubber legs. And for bodies, as mikechell said, flip flops are great. Get a pair from the dollar store, and you can make dozens of poppers. Just make sure they're thick enough. Also, look around for bulk packs of corks. I got 2000 on eBay for $10. They are made for some sort of mini wine bottle, but they are perfect size for bass and bluegill, and are tapered. I don't know about you, but buying those pre-made foam bodies can get expensive, or at least compared to the corks. Post some pictures if you tie some!! Quote Share this post Link to post Share on other sites