

LisaLou
-
Content Count
94 -
Joined
-
Last visited


-
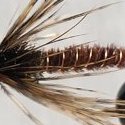
Chugbug I am sure you are right! I think a Turle knot would nestle in nicely between a head and hackle, in the neck area. It’s funny I misread it and was looking up turtle knot at first. This image is from Wikipedia. Thanks to everyone for all the comments. I’m so tickled this little mystery seems to be solved.
-
I guess the general consensus is to encroach and cover the small gap where the wire meets itself to form the loop of the eye. I thought that must be it, but was trying to figure out how the “Neck” between the hackle and head played into it. I thought maybe there was some old or regional knotting system that fell out of popularity. I guess the neck between the head and hacklendoesn’t have anything to do with securing the knot, it was just his style. It totally makes sense now that it was pointed out to me that manufacturing has improved, so that covering the gap isn’t an issue as it was years ago. Thanks to everyone for the input. I know modern materials like UV resin have changed things up, but sometimes there is a little gem of knowledge hidden in these old books, especially the self published ones. Years ago it used to be common for churches to self publish recipes of the congregation to raise money. Everyone is going to put their best recipe forward for that kind of thing, so those books often have great recipes and lots of hand written notes. Thanks, LisaLou
-
Hi, I have been building my library and buying tying books. I got a cool pamphlet style book from 1955. “Practical flies and their construction” by Lacey E Gee and Erwin D. Sias. It has line drawings and no photos. There are tons of them on auction. I got one along with a book I was really after, but did thumb through it right away. Don’t overlook it. It’s a really neat book and I’m going to try a deer hair bug soon, based on the method they show. My question is this. There are a few paragraphs about the dry trout flies of John Russ of Iowa City, Iowa. His flies were popular in Yellowstone and he copyrighted the name RusstieD. I am having trouble understanding the description and there is no drawing. I cannot find any references to him on an internet search. ”The eye of each hook becomes part of the head of the fly, thus covering the raw edge of the wire and preventing leaders from becoming chafed when casting or playing fish. Also, the head of the fly is built up on the eye of hook and a neck is left between the head and the hackle. This forms an excellent anchorage for the “tippet knot” reducing the chance of slippage and losing a fish and the fly.” I get there is a neck/gap between the head and the hackle. Is the head completely covering the eye of the hook, so you are knotting the tippet around the neck? Or is he just encroaching on the eye, covering the part where the eye loop closes, covering that spot with the cut end of the wire? What about the part about anchoring the tippet knot? What’s the neck between the head and hackle all about? Thanks for any input. I really enjoy reading old pattern books for my various hobbies, but they are often light in illustrations and sometimes it’s hard to visualize. I’m not sure there is much worse than the descriptions and abbreviations used in old crochet, knitting and tatting patterns, but I’m just not picturing this. thanks, LisaLou
-
Vicrider, I wish we could ice fish! The season was so bad, there are special emergency loans and funds for all the businesses impacted by the lack of snow and ice. The dogsled races were canceled again this year. I have never experienced such a mild winter and weird weather. We could have used the snow around Valentine’s Day for the race. Oh well. It’ll be walleye season soon. Here are some young Bald Eagles having fun in the wind out front of the house. They don’t have white heads and tails yet. You can see the snow is gone from the open areas. It rained too, and that got rid of most of it.
-
Very similar in Upper Michigan. This photo was Wednesday April 3rd, the middle of our road. Power flickered most of the morning and early afternoon, off for about 40 minutes total. Mostly annoying because I unplugged many of our smart home electronics and smart bulbs. I feel it’s hard on them to be cycling off and on so fast and the bulbs start flashing to be reset. The local news said there were many spots without power due to storm damage, but nothing over the top. Today the snow is gone in the sunny spots and roadway, but still thick in the shade. The ferocious winds are constant, about 15 sustained and 25+ mph gusts. On you will go Though the Hakken-Krakks howl.
-
It’s very very lovely and you clearly have a handle on your new hobby! You could tie a fly over an ornate, decorative pin like for a kilt, and make a broach or skirt pin for her. I plan on making some earrings using fly tying techniques. I’m not into fashion as all, but I’ve had a female friend tell me she would love some earrings as she now changes her earrings to match her outfit, even for casual wear at home. She informed me Earrings are now very “in” as it’s a quick way to change your look and they take up little room as for as accessories go. We were teens during Stevie Nicks height of popularity in the 1980’s and have a soft spot for feather earrings and anything boho and gypsy looking. I think a salmon fly on a kilt of skirt pin, or made into a tie clip bar for a guy would be a really classy and wearable gift for anyone. My brother and sister in law dress up fancy for dining out quite often and will probably be my first fashion victims. You can get ornate kilt pins earring findings at any craft and jewelry supply. Here is what I am talking about. Mother’s Day is right around the corner and Christmas will be here before we know it! You have her birthday covered. She can really show everyone who is the favorite kid and support your new hobby by wearing a fly. Trust me, your smug factor will be quite high when mom wears your handmade gift out to Mother’s Day brunch. https://www.canadiantubeflies.com/flytying-kilt-pins.html
-
Really nice eye candy, especially the scorpion and grasshopper. Thanks for posting.
-
I saw a device on auction as a fly thing vise, but it is a magnetic indicator base, commonly used by machinists. Is there a machinist out there that can give their opinion of the holding strength of one of these bases? I use a metal typing desk and love anything magnetic. Would this style of base be strong enough to be repurposed as a fly vise base? Maybe to hold a bobbin cradle or parachute device? I know there are many different sizes of magnets used, so mileage would vary. I could even see it as a lamp base, tying background plate holder, or a rod for draping materials to stage them. I’m sure it could handle that and be very useful as a multitasking base. but I would like to know if one has got the strength to not bob up and down under the pressure of tying. I also noticed there are stationary rods and other mounted on a ball joint. Thanks, LL
-
The craft fur brushes in the video are probably for pike, as he has other videos making like pike lures. I did not really think it was possible to make a 40” brush, that’s why I asked what was the longest viable brush length. I was simply stating the size of the work space I have for supplies and the brush table. thanks for all the help and comments. I will order a couple different gauges of wire to try. I sure wish I did not have to wait a week or more for everything to get to me. All I can find locally is craft jewelry wire which will surely rust. I probably have super fine copper wire somewhere if I can find it. Though It might just be copper colored jewelry wire with my luck. thank you all, LL
-
In this video, he makes three different brushes at the same time. It seems like a good idea to me. So the general consensus is 12” is normal and 18” probably the upper limit for getting a successful brush. It would be nice to make three 6” brushes at the same time, using the same materials distributed differently. I take full time care of my beloved 95 year old mother who is in a wheelchair and housebound, especially in wintertime. I am essentially housebound, too. My time is cut up into many short chunks 24/7, including my sleep. It seems like about the time I set up to do something, I have some other task to deal with and often times lose my momentum and creativity. Setting up and making several at the same time is very appealing. I’m also one of those people who really enjoy the process of prepping materials. I enjoy folding feathers for example, and really like picking out the materials to make thread dubbing brushes. I have watched many videos of dubbing brush tables and diy tables. I do not have room to store a proper table right now. There was an oasis tying station on auction that I coveted, very nice products. The lack of storage for a brush maker table is why I’m thinking of clamps on my desk. My personal space for hobbies is limited to my bedroom using my rolling typing desk for everything. Or lap projects while in other parts of the house. I (try to) tie in hand a lot while keeping my mom company, but rarely can ever finish anything. AMaking some brushes when I can’t sleep and have a hour to myself, then using them to tie tubes in hand while I keep her company is kind of my goal. Maybe not a realistic goal. But it sounds good in my head. My eyes are too shot by night for tying, but I could do some brushes. I could have less materials to keep untangled and maybe finish something during the day. With all the medical equipment, I don’t have room for a tying desk in my mom’s room. That is what would be idea. I could tie while she reads or puts together children’s wooden puzzles as hand therapy. Not to mention she is interested in the process. thanks for all the input, LL
-
I have made some dubbing brushes using a macrame board as a dubbing table using thread, flymph style. I am thinking I would like to make a proper dubbing brush setup, with rotating hooks on each end, or maybe the ability to attach a dremel to make a power spinner. I just discovered composite brushes and they look like a lot of fun the make. I saw plenty of comments that people did not like certain manufactured tables because they wished they could make a longer brush. I’ve seen commercially made brushes that are 12” long. I am wondering if there is a limit to how long a brush you can efficiently make, before materials don’t lock into the wire properly. My desk is an old metal typing desk on wheels, with a fold down wing extension on each side. It’s about 20” wide. With the wings up, I could support a set up around 40”. I’d lose a few inches to the mechanics of the spinner hooks on each end, but in theory I could make one long brush. I could load it with different materials and cut it to make many small ones. I should add I’m not actually making a base. I will use my rotating vise at one end and probably another cheapo vise at the other with a swivel to allow spin, so I can clamp them on my desk at whatever length I need them. I’m hoping someone has already pushed the limits of how long a wire dubbing brush can be made before it just doesn’t work. If someone has a good source for stainless 34 gauge wire, I would appreciate that too. I’m in Michigan for shipping, no fishing superstores near me. I also want to make some Pike and Muskie lures which are tied on coils, like springs. I was wondering if I should use a heavier wire for toothy big fish, or if 34 gauge will hold up for that application. I wonder if anyone would do a dubbing brush swap, instead of flies? I think that would be fun to swap brushes then make a fly with what you end up with. There would be a couple weeks between making the brushes, and then making a fly from each brush you receive from your swapmates, so there would not be too much pressure. Just a thought. thanks for any info, LisaLou
-
Hi, I got a bunch of packs of synthetic tying material. The orange reminds me of the fibers in an anti-static synthetic feather duster, kind of like Barbie having a bad hair day. I’m not sure what it is made out of. I reread the ad and it just says synthetic, no actual material makeup. before I start posting flies using this material, I would like to know the proper term for this stuff. It’s in a hank bound in half with a zip tie. I put a piece of tinsel and flashabou on it for size reference. thank you, LL
-
Yes, I am working with hanks or skeins of floss. I wanted to split the thread down the entire eight yards and wind it on a bobbin, rather than having a bunch of shorter cut lengths. I found the very slick rayon thread to be quite easy to split the full eight yards. I ended up doing the method of holding one thread and scrunching down the rest of the threads. Before starting, I found the middle and gripped it between the fingernails and “pushed” the twist down to the end, the went back to the middle and did it again toward the other end. Doing this a couple of times to align the threads and push out the twist made it much easier to extract a single thread. I then wrapped up half the thread and pushed it to the side to keep it out of the way. In the middle, I extracted a single thread and started pulling it out, using the technique shown in the video. I had to stop and push down the bunched up wad a few times as I was working with 8 yards, but was pleasantly surprised how easy it went. When the wad of threads balls up, STOP. Grab the very bottom of the wad and draw it out toward the free end. Get the threads vaguely aligned again, then start pulling out your single thread again. I tried peeling two threads at the same time and it was not worth it, almost tangled it up. Better to peel one thread, then do it again to peel out a second. Any additional threads peeled out are much easier, as most of the twist has been pushed out. So I completely peel out one thread from the middle to the end, then go back and pull out the feast of the thread from the middle toward the other end. I tried starting and one end and working toward the other, but eight yards was too much to manage so did half at a time. It worked, but I think it was longer time wise and more fiddling to work from one end to the other, than working from the middle out. Remember it is only this easy with shorter lengths. I had to ease that wad of thread back down towards the end several times, to completely extract one thread. Two single eight yard threads will come close to filling a standard sewing machine bobbin. The remains four strand length of thread was wound around a plastic embroidery thread card and will be stored until needed, or if I want to use several strands at once for a special effect. On sale, It cost me 37 cents per skein. So I ended up with 48 yards once separated, if used single strands. I have used more strands for different effects. Cotton floss is also available and from what I have read, will work just fine for tying as long as you let the flies dry after use. It is not shiny, but does come in variegated colors, while the rayon generally is only solid colors for some reason. metallic floss doesn’t seem to go on sale very often and is generally $2 to $4 for 8 yards(48 when split) Metallics are harder to split because the threads drag against each other. It can be done doing the push down splitting method as above, but I found a video of a gal splitting threads using a fishing swivel. This works very well and is less stressful on the metallics. This method works. I tried it out and was able to peel a single strand by 8yards. i also made a few braided hanks. This really is a nice method if you are happy with shorter lengths. Also you can hang the hanks in a hanging file folder storage box, with seems like an awesome storage method. The other advantage is you can pull out two or more strands at the same time without a tangled mess. I actually prefer working with the shorter cut strands because am not using a bobbin holder very often. I wound a bunch of thread on bobbins in hope to force me make friends with my bobbin holder. As I mentioned before, after many years of crocheting, I am very “hands on” with holding and tensioning thread. The cheap, frugal, crafter in me also worries about too many unusable short lengths of thread. you can see in this video how you could do this technique and hang the whole thing inside a hanging file box. I personally would not braid everything together, I would do individual, so you can remove one if you wish. this is a commercially made system, but could easily be done by repurposing the top portion of a file folder and making your own hangers. I hope this helps out anyone else who is interested in using hanks or skeins of floss and separating it into individual threads. There are so many options in floss out there to try. And from what I read, do not be scared off by cotton floss. I read many forums and posts about cotton floss and cotton sewing thread being used. it does not rot if allowed to dry out. It is a softer look that will fuzz up, but for many flies, that buggy look is perfect. here are some of my own photos that I hope helps. Videos sometimes go away and there is nothing to see. Cut and loosely twisted, then coiled around each other. You could braid as well. I looped the tail through the top so it can be hung up and not hang down so long. Unloop it first. isolating a single strand to pull out with my fingers. You can see how it bunches up a little. Because it is metallic and a little grippy, I pulled out one side, then the other. the thread is out and I smoothed out the Hank by pulling on the bottom and top gently. The hank is none too mussed up. isolating a single thread in middle of an 8 yard length of Rayon floss. Don’t forget to draw the floss through your pinched fingers to push out as much twist as possible before you start. IT REALLY HELPS! I coiled up the other 4 yards around a piece of cardboard to keep it from trying to join in with the rest of the party. I am pulling on a single strand and letting the rest bunch up in my hand until I feel resistance. Oh my God! What have I done! Don’t panic. Grab the bottom of the wad and draw it down toward the end. Keep tension on your single thread. it will unruffle and you can then pull up on your single thread until you have another thread nest to draw out. the threads are not knotted, only wound around each other. That is why before I started, several times I drew the length through my fingernails and pushed out as much twist as possible. there are many options and it’s a cheap way to get colors you might not use often, or are unavailable in fly thread. i am posting this before I screw up and delete it somehow, so I will edit it later for glaring errors. Best regards, LisaLou
-
Thank you Phluffhead. It does look more like a squid for sure. I eat shrimp more often so that is what came to mind, after cleaning and de-veining a bunch of shrimp for Christmas (not sure I want to do that again, I had pruny fingers by the time I was done) It’s super easy fly to make. thank you Niveker. I stayed simple because I really liked how the black and gold thread looked. The square beads is one of the few I have that the 2mm tube fits into easily. I almost put a big red dot of nail polish on two sides for eyes, but let it go. I love the name, so thanks for naming the fly! And great work everyone. It's always an inspiration to visit this thread. Thanks for taking the time to take photos and post.
-
Hi, I’m wondering if anyone is using thread or floss that comes in hanks, rather than on spools. Embroidery floss is usually in hanks. However I have a bunch of silk floss in hanks, waiting to be used. Like embroidery floss, it is several strands wound together. It is intended to be separated into individuals strands when used, so winding the whole hank onto a bobbin or around an index card isn’t that much of a help. What is commonly done is the Hank cut and folded in half. Then you make a loose braid . You hold the bottom of the braid at the cut end. At the fold over at the top of the braid, you tease out a single strand and pull it out. The rest of the strands stay relatively together in the braid. because the floss is folded at the top, your working length is double the braid length. The big question is, what length do I cut the strands for the braid? Cross stitchers generally go around a foot to 18”. More than that, and you are roughing up the thread too much by pulling it through the fabric too many times. Because we wrap, that is not an issue. I do think realistically, 24 to 30” is about the longest I can go because the braid gets to ruffled up trying to pull longer lengths of thread out. People hang these braided hanks in hanging file folder plastic bins to store them, so it seems like good Hank thread management. But I don’t want to shoot myself in the foot having lengths of thread too short to complete a fly without relying in the thread. A hanging file box is 11” deep, so I could easily make braids with 20” threads. to complicate matters, do to reasons of a new puppy and elderly people, I am now focusing on tube flies to try and keep the hooks put away. When the puppy isn’t constantly into everything, I’ll be comfortable having hooks out. i can post photos if it helps. It makes sense to me, but I think my description might be confusing. I’m sure most people are using spools, but I just got a package of a hundred colors of silk thread hanks to try out, and could never afford to buy that much spooled. I have not tied enough tubes to have a real idea what amount is normal. If someone else has a floss management system for tying, I would love to know. I split a couple hanks of 6 strands floss that were 8 yards long into its individual strands and wound them on bobbins. Each bobbin has either a Single strand, two stands, or three strands, using all six. It is the most frugal method since there is no short leftover pieces of thread and gives me choices as to thread density. but does use three bobbins per hanks and is so time consuming. This method is something I will reserve for my variegated metallic and other exotic flosses. They are worth it. Thanks for any input, LL